
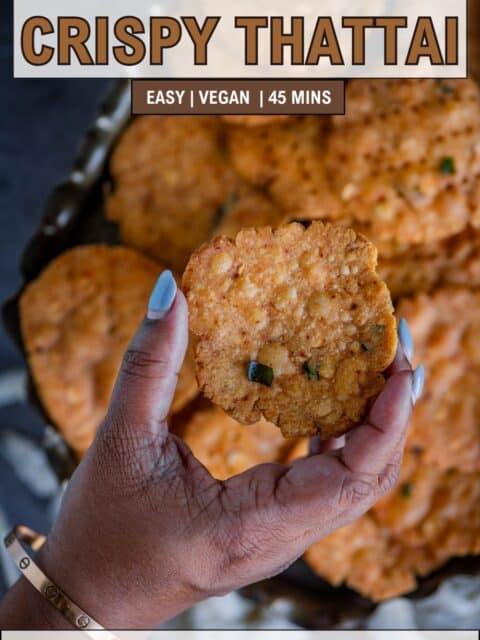
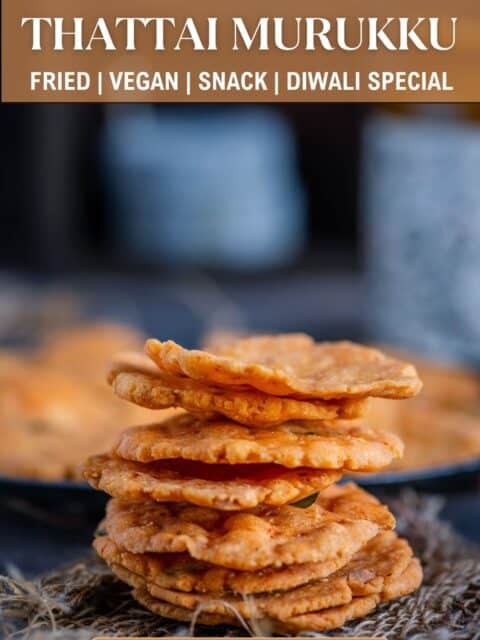
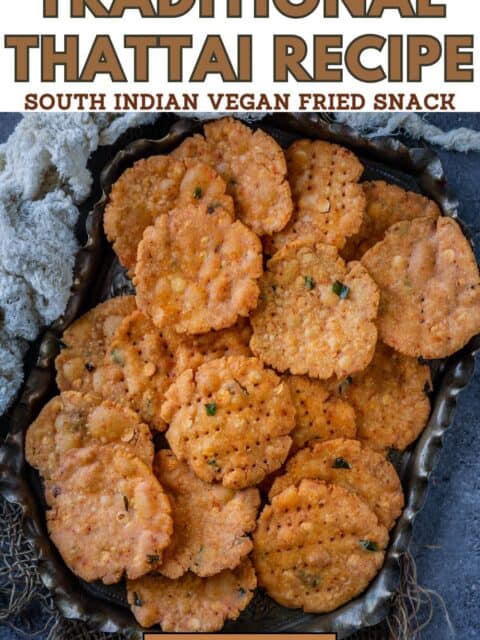
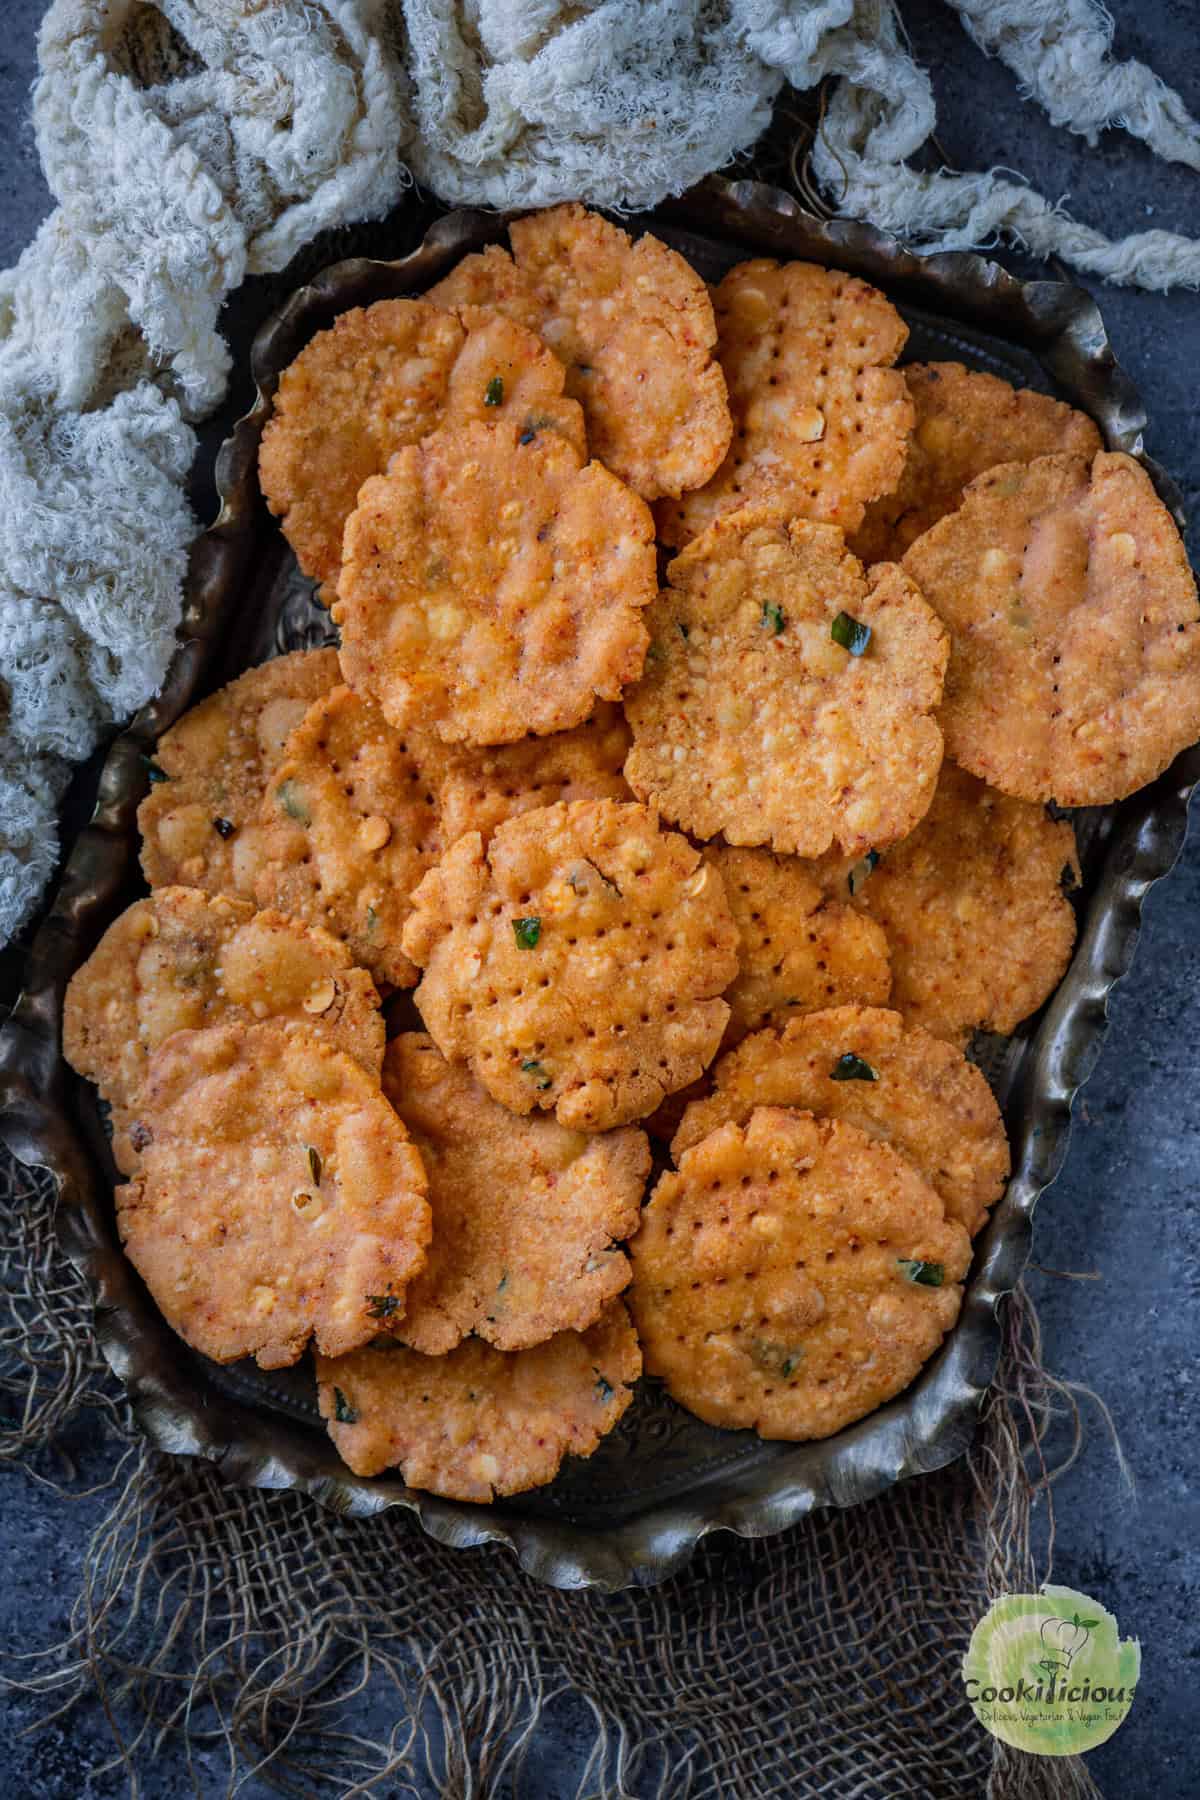
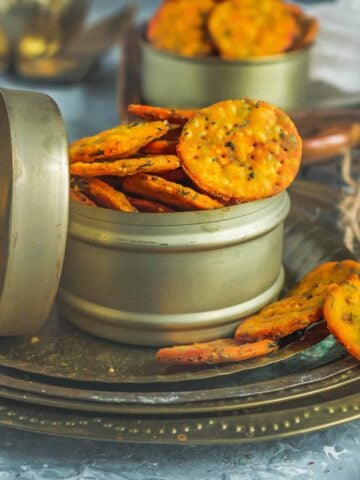
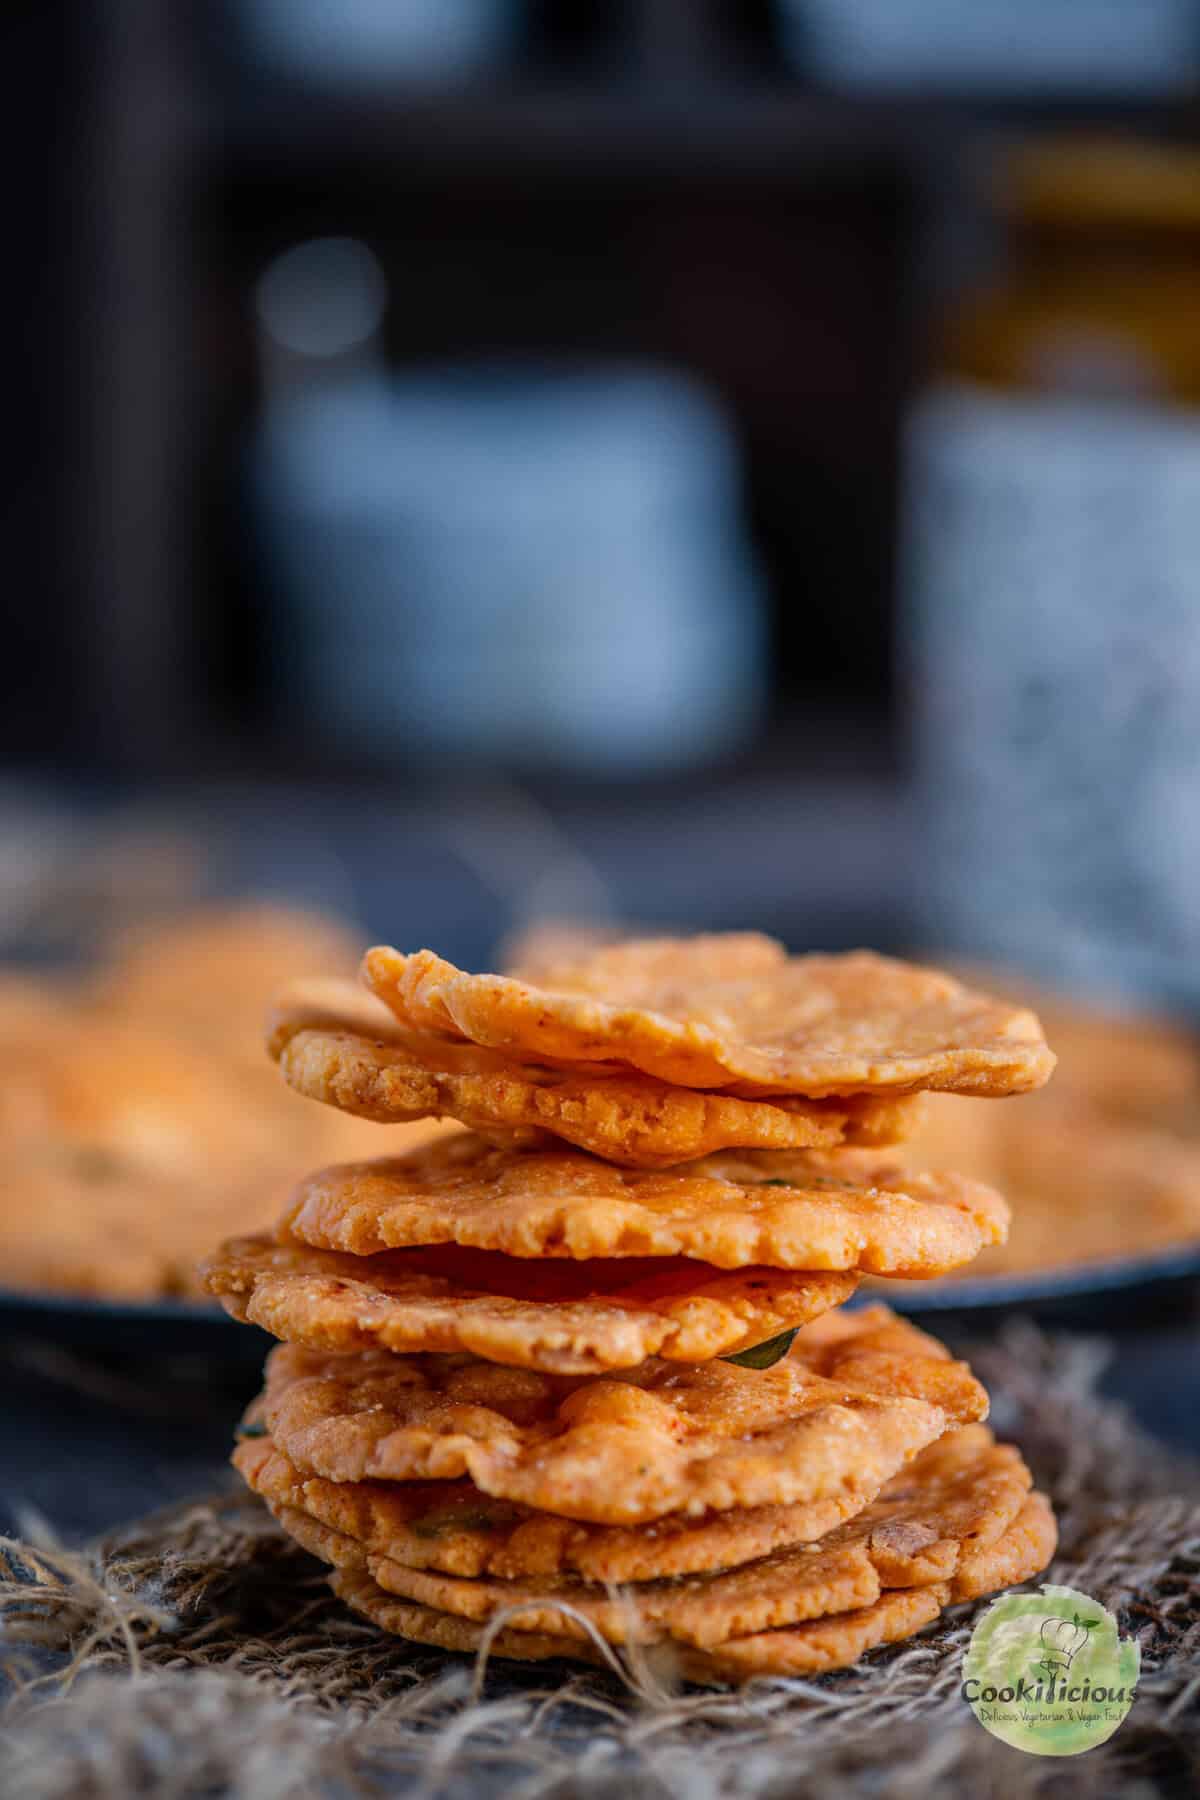
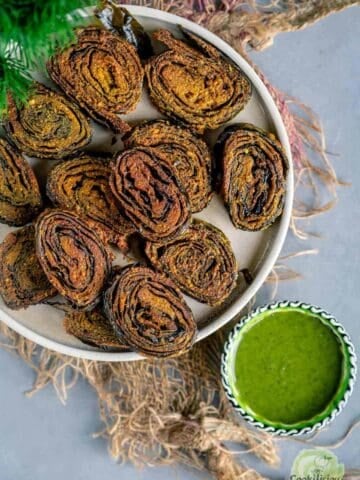
Savor the festive goodness of Thattai, a beloved South Indian fried snack traditionally made for Diwali, Krishna Jayanthi, Pongal, and tea-time moments. These crispy rice crackers are crafted from a flavorful mix of rice flour, urad dal flour, and basic aromatic spices. Naturally gluten-free and vegan, they offer a delightful crunch and authentic flavor with every bite. This easy homemade Thattai recipe brings festive crunch and nostalgic flavor to your kitchen. Make it in just 45 minutes!
Jump to:
What Is Thattai
Thattai is a traditional South Indian snack that's flat, disc-shaped, and deep-fried to crispy perfection. Made primarily with rice flour and urad dal flour, Thattai gets its name from the action used in shaping it-dough balls are placed on a greased sheet or banana leaf and flattened (or "thattified") with fingers before frying. This unique step gives the snack both its name and its iconic thin, crunchy texture.
Also known as Thattu Vadai, Thattuvadai, Kara Thattai, Chekkalu (Andhra), or Nippattu (Karnataka), these crispy rice crackers are flavored with red chili powder, curry leaves, asafoetida, and roasted chana dal, making them crunchy, spicy, and addictive. Naturally vegan and gluten-free, this traditional South Indian snack is enjoyed as a tea-time treat, festive snack, or travel-friendly dry snack.
Though its shape and texture resemble Papdi used in Indian chaat recipes, Thattai has a very distinct taste profile. A well-made Thattuvadai should be super crisp and crunchy with a good snap when broken, yet not overly hard to bite-perfectly balancing texture and flavor. In some South Indian homes, sweet Thattai is also prepared, though I haven't had the chance to taste it yet.
I have fond memories of my grandma making this crispy South Indian snack whenever we visited her in Trichy-not just for festivals but as a special treat, much like how she would prepare Ammini Kozhukattai. She truly made the best homemade Thattai-perfectly crisp, golden, and full of flavor.
I can still recall the taste of those traditional rice crackers, fresh out of the hot oil. Back then, she never let us help; she would prepare every batch herself with so much love and patience. Those golden days of enjoying her authentic Thattai recipe remain some of my sweetest food memories.
Why Make It
- ✨ Vegan and Gluten-Free South Indian Snack - Crispy, savory rice crackers made without dairy or wheat.
- 🎉 Perfect Festive Treat and Edible Gift - A must-have snack for Diwali, Krishna Jayanthi, Pongal, and holiday celebrations.
- 🥣 Made with Simple Pantry Ingredients - Rice flour, urad dal, curry leaves & spices come together for authentic flavor.
- ⏱️ Ready in Just 45 Minutes - Quick, easy, and beginner-friendly homemade Thattai snack recipe.
- 🥥 Thattu Vadai Without Coconut - This traditional South Indian snack is made without coconut, ensuring a longer shelf life while keeping its authentic, crispy flavor.
🧾 Ingredients Needed
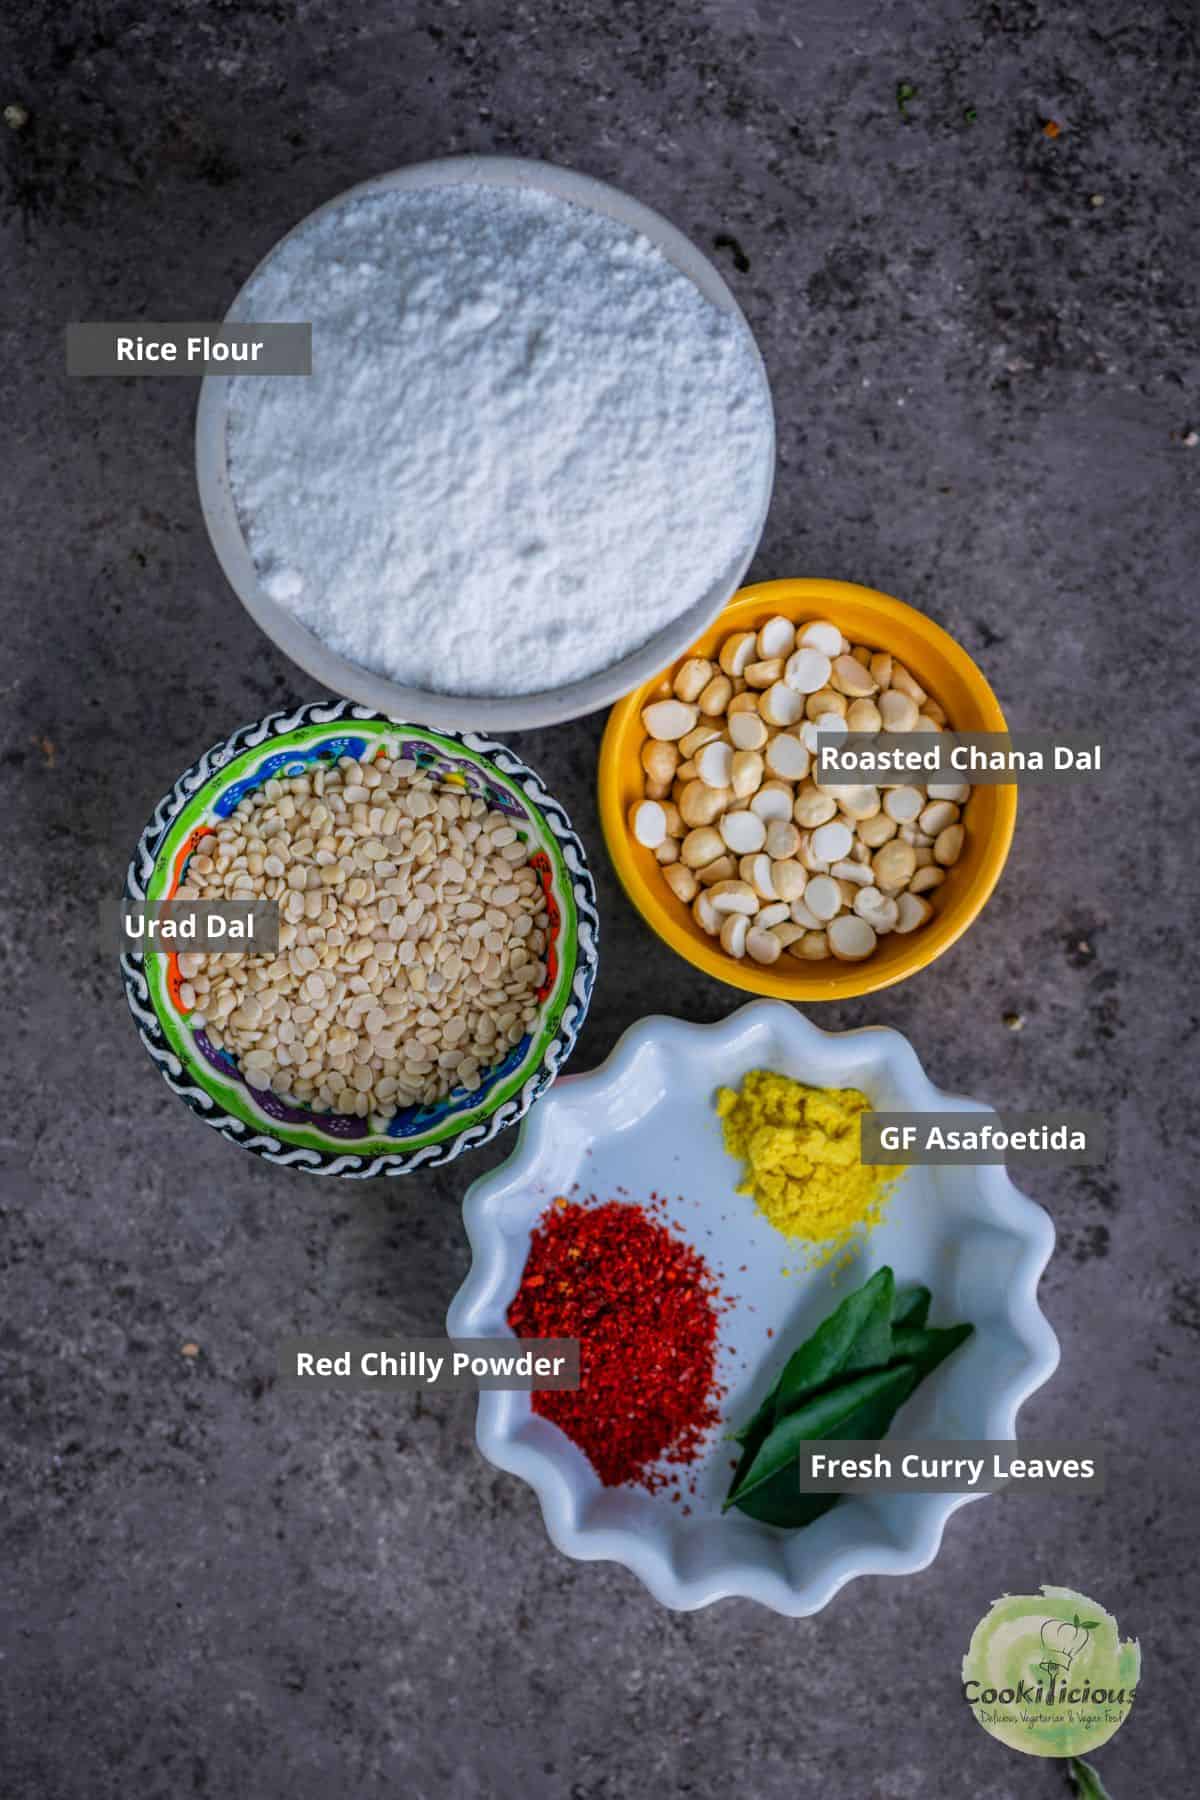
Rice Flour 🍚
- I used store-bought raw rice flour from the Indian grocery store. Always check the packet label-it should say raw rice flour and not parboiled rice flour.
- You can also use homemade rice flour, or even Idiyappam flour or Kozhukattai flour as substitutes.
- Other recipes you can try with rice flour include Rice Flour Crepes, Ammini Kozhukattai, and Onion Rava Dosa.
Lentils 🫘
- Use urad dal and roasted chana dal (also known as daliya or pottukadalai).
- Avoid store-bought urad dal flour-it is usually not roasted, and the texture will differ.
- If you don't have roasted chana dal, soak regular chana dal (Kadala Paruppu) for 15 minutes, drain, and add it to the flour mix for crunch.
Spices and Flavorings 🌿🌶️
A combination of red chili powder, gluten-free asafoetida (hing), and fresh curry leaves gives Thattuvadai its signature flavor. The spices add just the right amount of heat, while asafoetida not only enhances taste but also aids digestion.
How To Make It 🔪
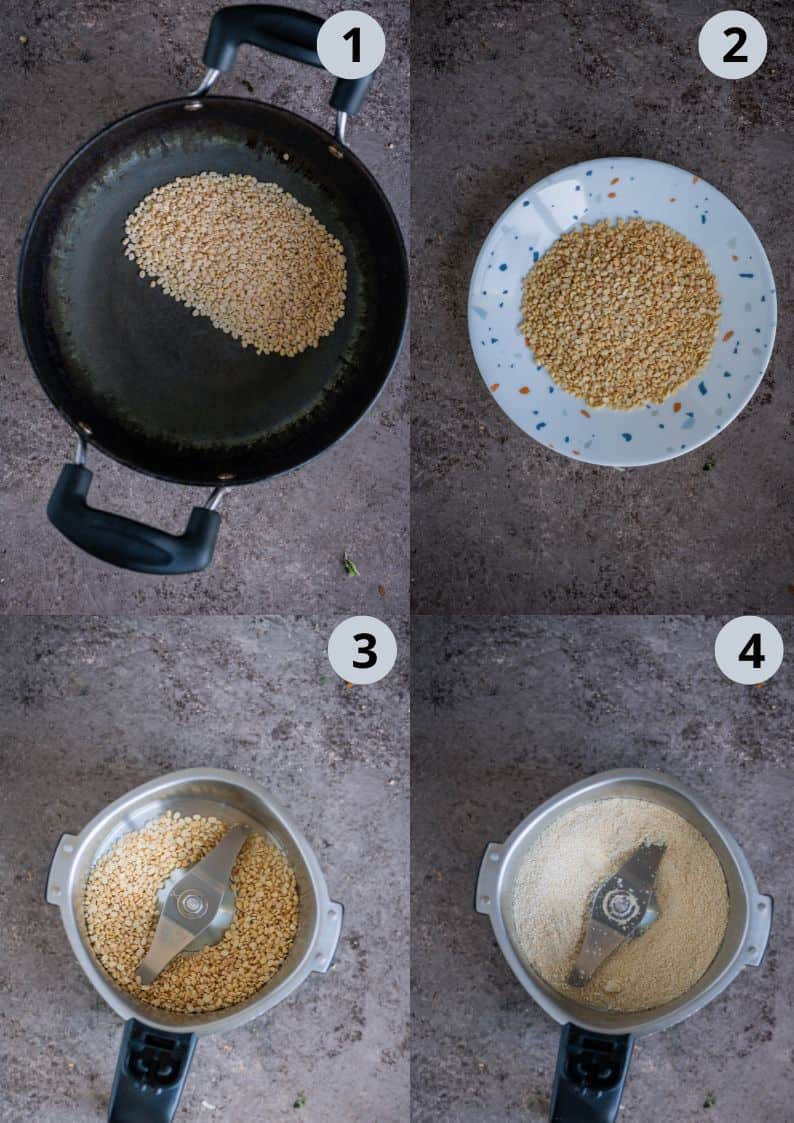
- Dry roast urad dal in a pan on low flame for 1-2 minutes, stirring continuously until it turns light golden and aromatic. Be careful not to burn it. Chef tip - If your blender cannot grind just 2 tablespoons of urad dal finely, roast ¼ cup instead, grind it into a smooth powder, and measure out only 2 tablespoons for this Thattai recipe. Store the remaining urad dal flour in an airtight jar for later use.
- Remove from heat and transfer the roasted urad dal to a plate. Let it cool completely.
- Then transfer to a blender jar.
- Grind it into a fine powder using a blender.
- Sieve the urad dal powder into a large mixing bowl.
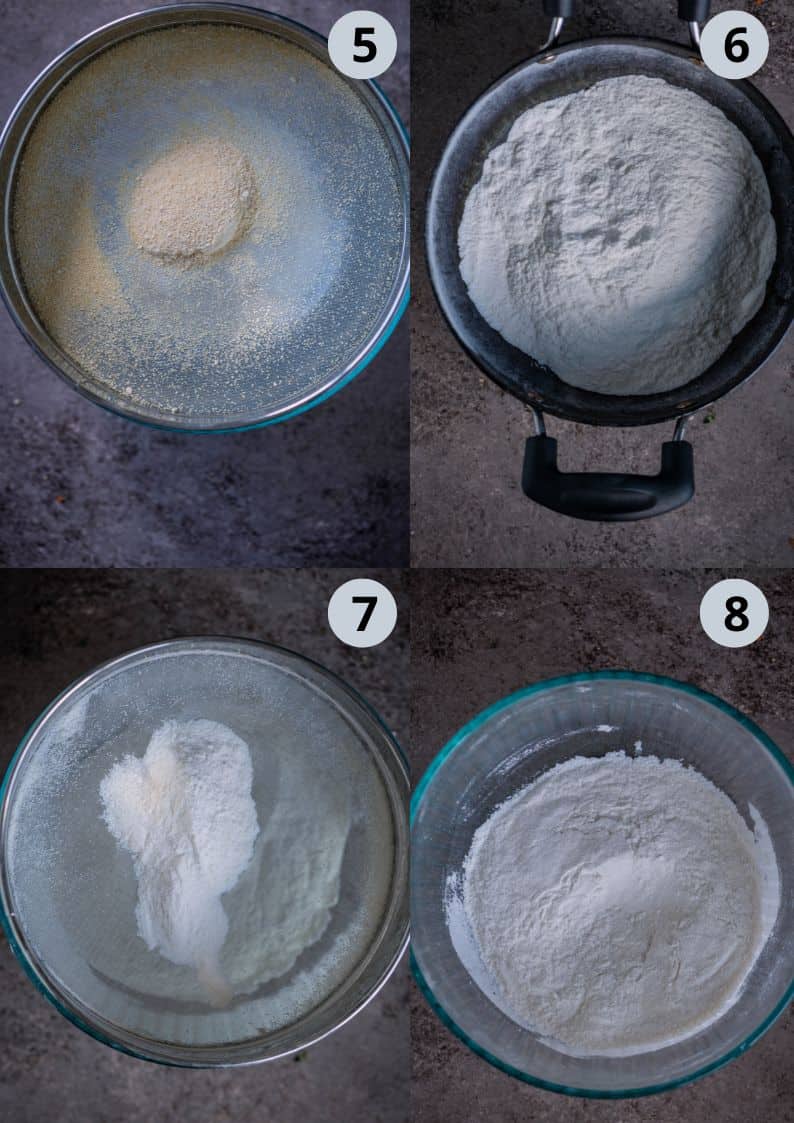
- In the same pan, dry roast rice flour on low flame for about a minute. Do not over-roast or let it change color. This step helps remove moisture from the rice flour.
- Sieve the roasted rice flour in the similar way. This step ensures a smooth, lump-free dough for making crispy Thattuvadai.
- Mix both the flours together.
Want to save this recipe?
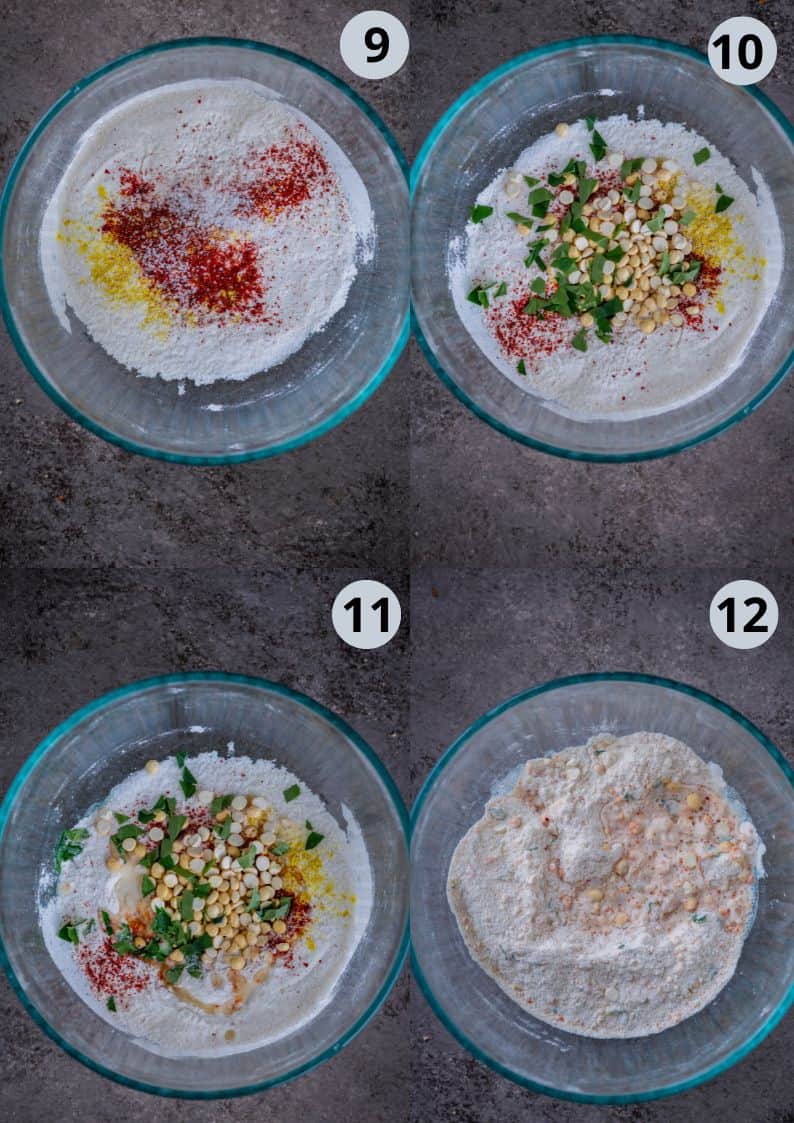
- Add salt, red chili powder, and gluten-free asafoetida (hing) for seasoning.
- Tear fresh curry leaves into small pieces and add them, along with the roasted chana dal, for extra crunch.
- Heat oil in a pan for frying. Once warm (not hot), take about 1 tablespoon of this oil and pour it over the flour mixture. This helps create a crispy texture in the Thattai.
- Mix everything well, then gradually add 2-3 tablespoons of water at a time until the mixture resembles coarse breadcrumbs.
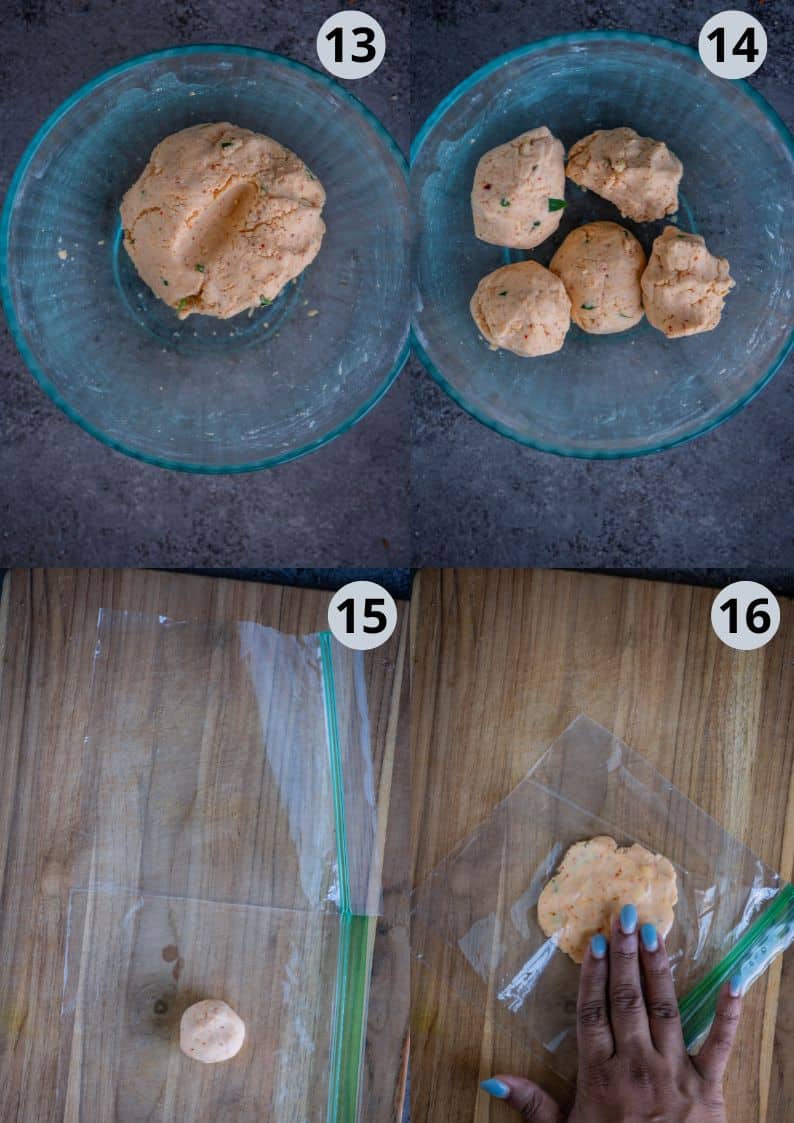
- Knead into a smooth yet firm Thattuvadai dough using your greased hands or a food processor. It should not be very hard otherwise the Thattai will crack. Sprinkle water as needed-on average, about ½ cup + 2 tablespoons of water works perfectly.
- Divide the prepared Thattai dough equally into medium-sized balls. Chef tip: use a tablespoon to measure dough balls for even-sized Thattai. Keep the dough balls covered with a damp cloth to prevent them from drying out.
- Cut open a ziplock bag, lightly grease one side with oil, and place one lemon-sized dough ball on it. Flatten the dough ball slightly with your fingers.
- Cover with the other side of the bag and gently press the dough with your fingers to spread it into a thin, round disc, pressing from the middle to the outside. Alternatively, you can use a flat-bottomed bowl to press the ball evenly. Ensure the Thattuvadai is flattened uniformly; otherwise, it may remain soft or soggy in the center. Do not press it too thin, it will break, and if you keep it very thick, it will not become crispy.
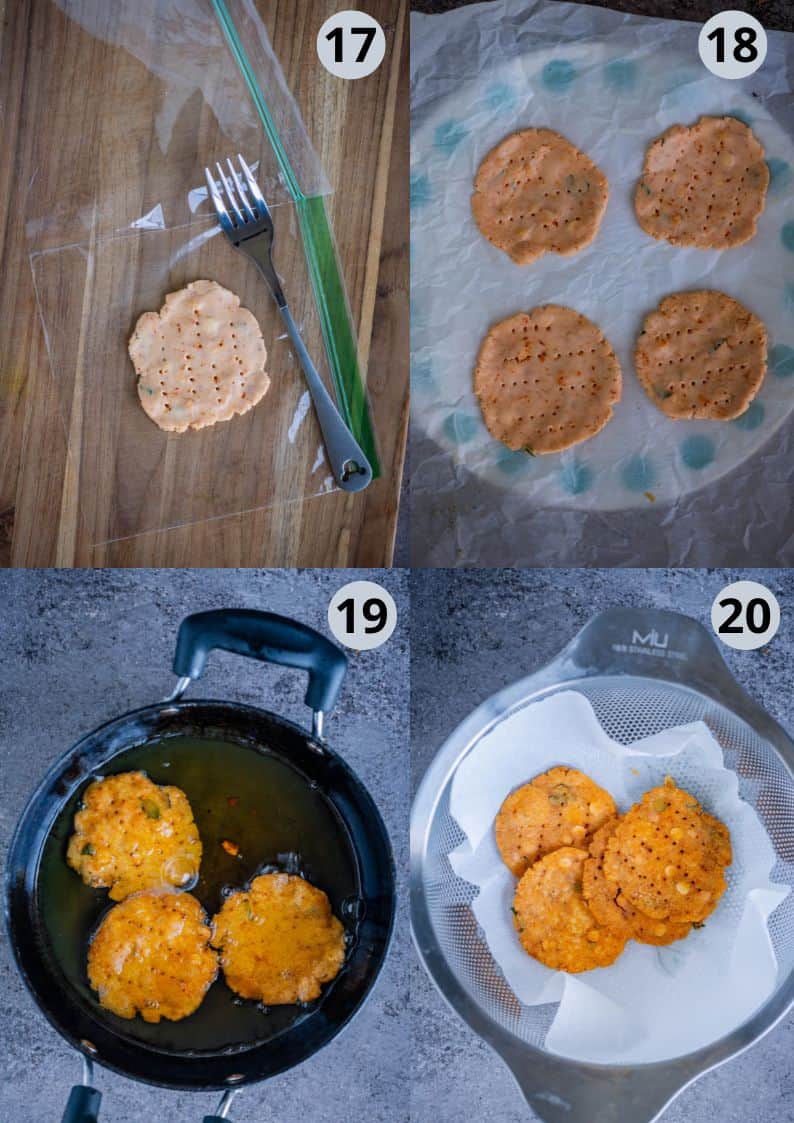
- Using a fork, prick small holes randomly on the surface to ensure the Thattai doesn't puff up like a puri and turns crispy. Prick each one at least 2-3 times.
- Prepare as many discs as needed for a single frying batch and place them carefully on parchment paper.
- Heat oil for deep frying on medium flame. Once the oil is hot, gently slide in 2-3 shaped Thattai at a time. Do not overcrowd the pan. Fry on low to medium flame, flipping occasionally, until they turn evenly golden brown and crispy. They are perfectly done when the bubbles subside completely and both sides are uniformly fried.
- Remove and drain the fried Thattai on a paper towel to absorb excess oil.
🍽 Serving Suggestions
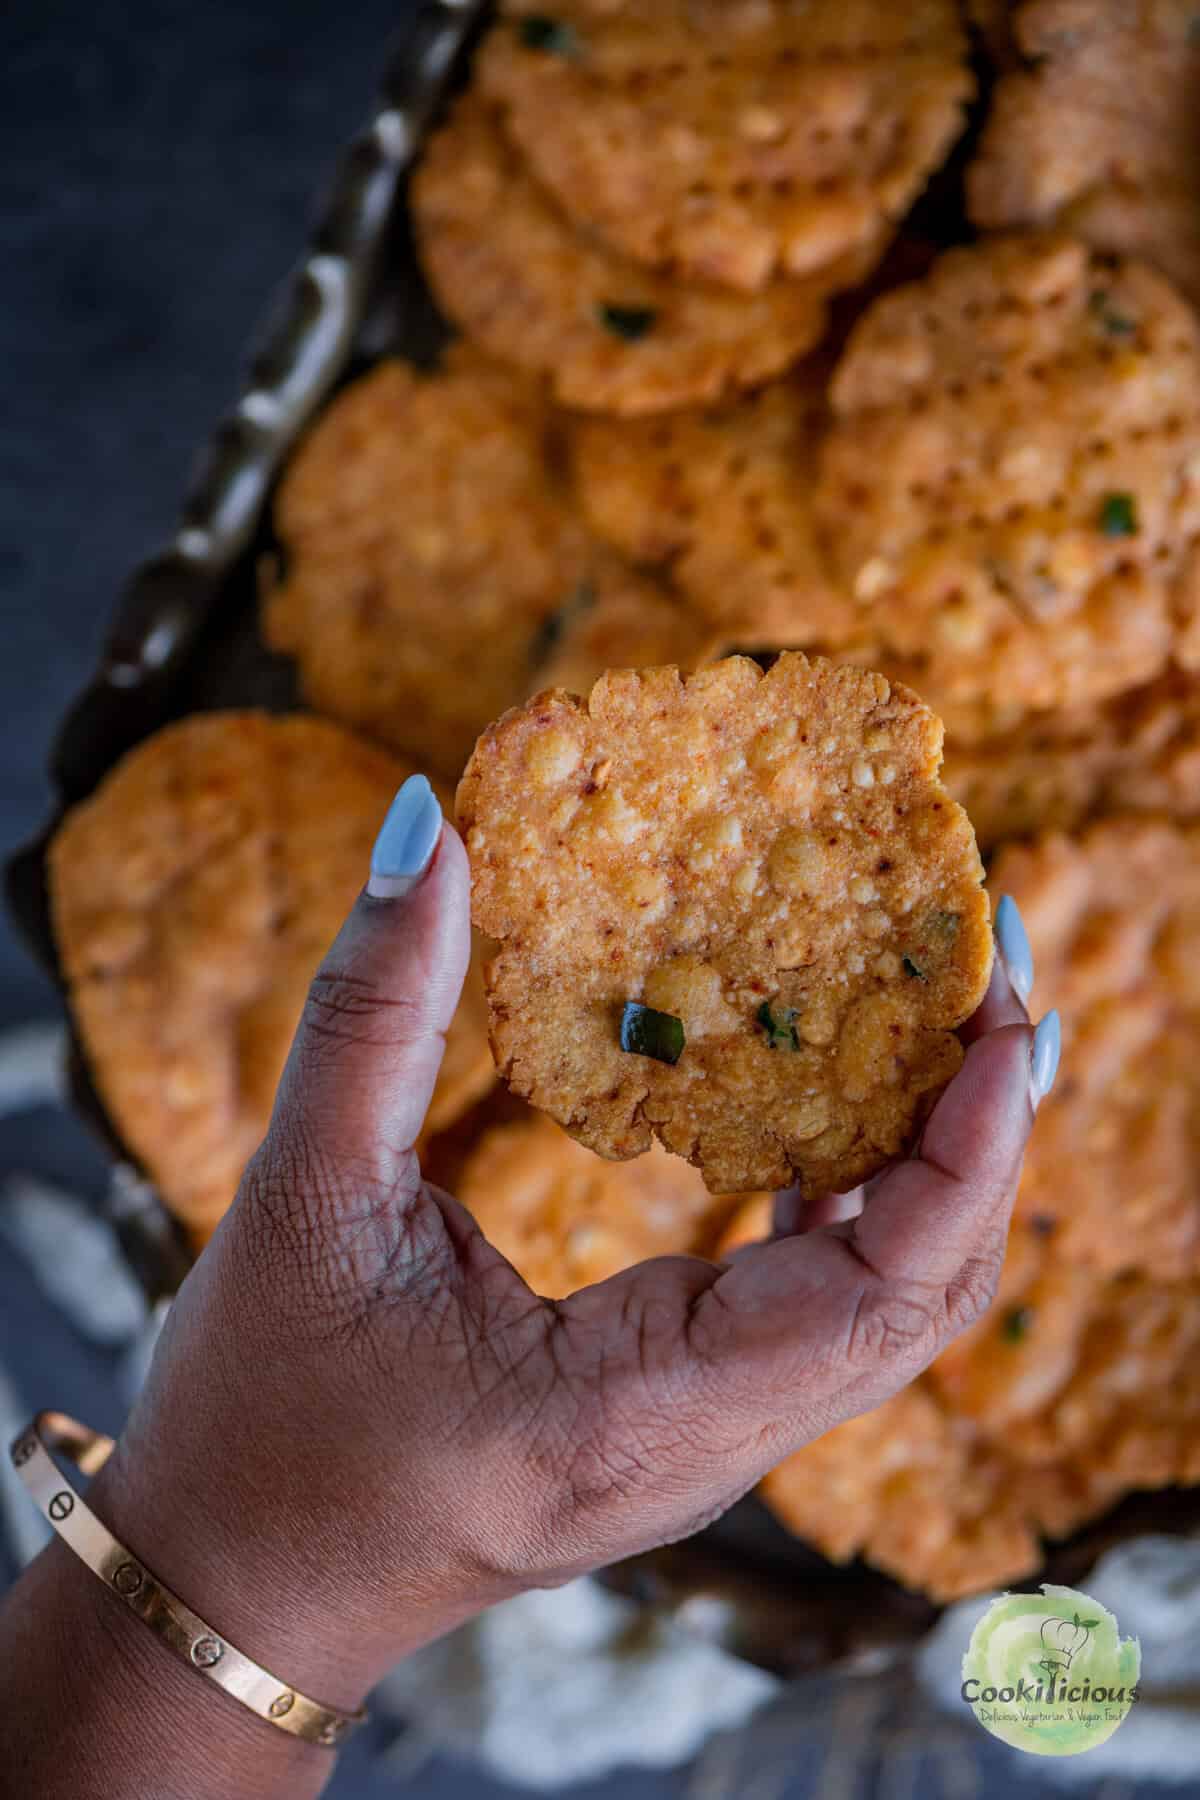
Allow the Thattai rice crackers to cool down completely before transferring them to an airtight container. These crispy South Indian rice crackers stay fresh for days and make the perfect anytime snack. You can enjoy them plain-no dip or chutney required-or pair them with your evening tea, coffee, or even a cozy Café Mocha.
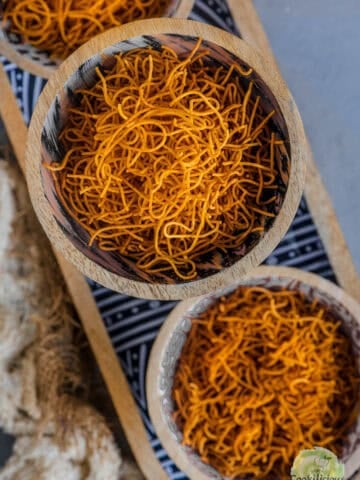
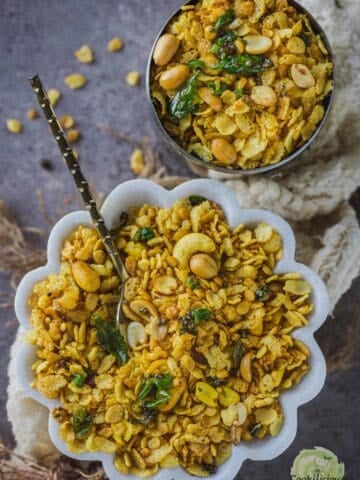
Besides Thattai Murukku, you can also try other festive dry snacks like Cilantro Mathri, Banana Chips, Chiwda, Roasted Almonds, and Kara Boondi Mixture. If you're planning for Diwali, check out my Diwali Snack Roundup for a collection of sweet and savory recipes. Thattuvadai also pairs beautifully with traditional festive dishes like Payasam, Sundal, Sambar, and Paruppu Vadai, making it a complete South Indian-style spread. It's also a great snack to carry along for road trips and long journeys since it stays crunchy for days.
When to make Thattai Murukku
Thattai Murukku is a traditional South Indian snack often made during major festivals like Diwali, Krishna Jayanthi (Gokulashtami), Pongal, Raksha Bandhan, and Tamil New Year. Known as a classic Bakshanam in Tamil households, these crispy rice crackers are a festive staple, loved for their light crunch and subtly spiced flavor.
Since Thattai has a long shelf life, it's not only ideal for festivals but also makes a wonderful edible gift. Packed in a decorative box, these vegan and gluten-free namkeen rice crackers are a thoughtful homemade treat for family and friends during Diwali, Thanksgiving, Christmas, or even Halloween.
After all, who wouldn't love receiving a box of freshly made Thattai Murukku-a vegan savory snack that brings back nostalgia, spreads festive cheer, and delivers irresistible crunch with every bite?
💭 Priya's Recipe Tips
Lightly roasting the rice flour and lentil flour enhances the flavor and removes any raw smell, giving your thattai murukku a richer taste. If the dough feels too sticky, sprinkle in a little roasted rice flour and knead until smooth. This helps maintain the right texture for crispy thattai rice crackers. Do not over-fry them. Remove them as soon as they start to turn golden brown-they will continue to darken and crisp up as they cool. While many use a ziplock bag for flattening the thattai, you can also shape them on a piece of banana leaf or parchment paper for an authentic, fuss-free method.
FAQs 📖
If your thattai murukku doesn't turn out light and crunchy, it could be due to a few common mistakes:
Right dough consistency: Avoid adding excess water while kneading. The dough should be firm but pliable-not too hard or too soft. Always keep it covered with a damp cloth to prevent drying. If it does dry out, sprinkle a little water and knead again.
Do not rest the dough too long: Once the dough is ready, shape and fry the thattai immediately. Resting for too long can dry it out and cause cracks.
Flatten evenly: For crispy thattai, each disc must be pressed thin and even. If too thick, the center may remain soft or chewy.
Oil temperature matters: Fry the South Indian crackers in hot oil (not smoking). If the oil is too cool, the thattai will soak up oil and turn soggy instead of crisp.
Cook and cool properly: Fry until light golden brown, then let the crispy thattai murukku cool completely before storing in an airtight container. This ensures they stay crunchy for days.
With these tips, you'll always get perfectly crisp, crunchy, and flavorful thattai.
While the classic Thattai recipe uses rice flour, urad dal, chana dal, and spices, there are several delicious variations to experiment with:
Shredded Coconut 🥥 - Adds a subtle sweetness and texture, but reduces shelf life. Best consumed immediately.
White Sesame Seeds or Ellu - Sprinkle along with roasted chana dal (daliya) for a nutty crunch.
Spices and Heat 🌶️ - Some households add garlic, red chili flakes, or black pepper to make Pepper Thattai (Milagu Thattai), a spicy and aromatic version.
Peanuts 🥜 - Roasted peanuts can be mixed in for added crunch and flavor.
Butter Thattai 🧈 - Instead of pouring hot oil when making the dough, use melted butter for a richer taste and softer texture.
If you don't have pottukadalai, soak chana dal (Kadala Paruppu) for 15 minutes, drain, and mix it into the flour. These variations allow you to customize your crispy South Indian Thattai Murukku while still maintaining its iconic crunch and flavor.
Yes! While traditional Thattai is made with rice flour, you can create crispy South Indian Thattuvadai using alternative flours:
Maida / All-Purpose Flour - Creates a soft yet crunchy texture.
Besan / Gram Flour - Adds a nutty flavor and enhances crispiness.
Mixed Lentil Flour - For a protein-rich, savory twist.
Millet Flours like Ragi or Teff - Perfect for a healthier, gluten-free version.
These flour substitutes allow you to enjoy a vegan, gluten-free South Indian snack while keeping your Thattai crisp and flavorful.
Once your vegan South Indian Thattai has cooled completely, transfer them to an airtight container and store at room temperature. There's no need to refrigerate. When stored properly, these traditional Thattai Murukku snack stays fresh and crunchy for 12-15 days. Enjoy them straight from the container-no reheating required. Perfect as a tea-time snack, festive treat, or travel-friendly dry snack.
Yes! While traditional Thattai Murukku is deep-fried, you can make healthier baked or air-fried Thattai as an alternative:
Baked Thattai 🍪
Preheat your oven to 350°F (175°C).
Place the flattened Thattai discs on a baking tray lined with parchment paper.
Bake for 12-14 minutes, then flip and bake for another 12-14 minutes until the crackers or until they turn crispy and golden.
Air-Fried Thattai 🌬️
Preheat your air fryer to 345°F (175°C).
Place the flattened discs in the air fryer basket.
Cook for 8-10 minutes, flip midway, and cook an additional 2-3 minutes if needed for a golden-brown edge.
⚠️ Disclaimer: I have not personally tried these baked or air-fried versions. The final texture may differ from the classic crispy, deep-fried Thattai Murukku.
These alternative methods allow you to enjoy vegan, gluten-free South Indian snacks with less oil while still retaining the festive flavor of traditional South Indian rice crackers.
As the name suggests, Button Thattai or Mini Thattai are small, bite-sized versions of the classic Thattuvadai. Shape the dough into mini discs or crackers and deep-fry them until crispy and golden brown. These South Indian mini rice crackers are the perfect namkeen for tea-time snacks, festive platters, or gifting, and they carry the same crunchy texture and flavorful spices as traditional Thattai.
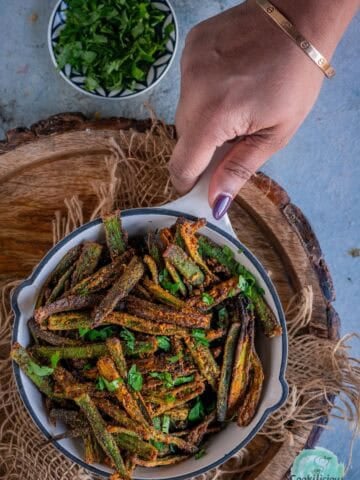
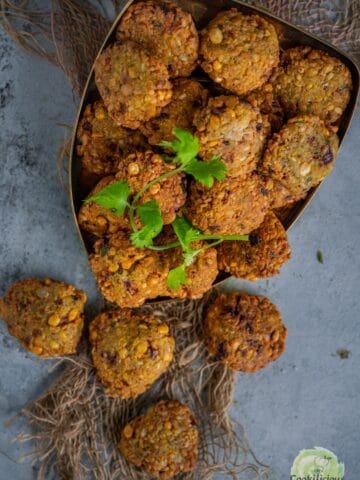
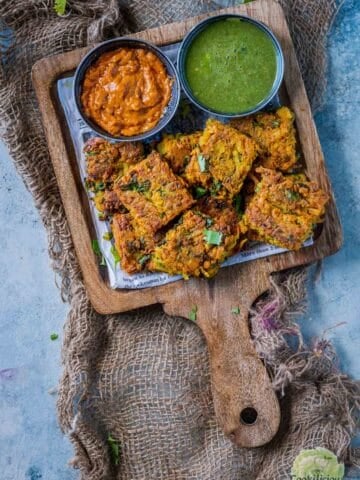
More Easy South Indian Snacks For Diwali
⭐️ Subscribe to the Cookilicious Newsletter and receive new recipes straight to your inbox! You'll receive my FREE Vegan Beginner's guide as a gift. Ready to elevate your cooking game? Purchase my Cookbook - The Essential Vegan Indian Cookbook today!
Recipe 📖

Crispy Thattai Recipe - South Indian Rice Crackers
Ingredients
- 2 tablespoon urad dal
- 1 cup rice flour
- 2 tablespoon roasted chana dal
- 1 teaspoon Salt or add as per your taste
- 1 teaspoon chilly powder
- ½ teaspoon asafoetida
- 8-10 fresh curry leaves
- ¾ cup water
- oil for frying
Instructions
- Dry roast urad dal in a pan on low flame for 1-2 minutes, stirring continuously until it turns light golden and aromatic. Be careful not to burn it. Chef tip - If your blender cannot grind just 2 tablespoons of urad dal finely, roast ¼ cup instead, grind it into a smooth powder, and measure out only 2 tablespoons for this Thattai recipe. Store the remaining urad dal flour in an airtight jar for later use.
- Remove from heat and transfer the roasted urad dal to a plate. Let it cool completely.
- Then transfer to a blender jar.
- Grind it into a fine powder using a blender.
- Sieve the urad dal powder into a large mixing bowl.
- In the same pan, dry roast rice flour on low flame for about a minute. Do not over-roast or let it change color. This step helps remove moisture from the rice flour.
- Sieve the roasted rice flour in the similar way. This step ensures a smooth, lump-free dough for making crispy Thattai.
- Mix both the flours together.
- Add salt, red chili powder, and gluten-free asafoetida (hing) for seasoning.
- Tear fresh curry leaves into small pieces and add them, along with the roasted chana dal, for extra crunch.
- Heat oil in a pan for frying. Once warm (not hot), take about 1 tablespoon of this oil and pour it over the flour mixture. This helps create a crispy texture in the Thattai.
- Mix everything well, then gradually add 2-3 tablespoons of water at a time until the mixture resembles coarse breadcrumbs.
- Knead into a smooth yet firm Thattai dough using your greased hands or a food processor. It should not be very hard otherwise the Thattai will crack. Sprinkle water as needed-on average, about ½ cup + 2 tablespoons of water works perfectly.
- Divide the prepared Thattai dough equally into medium-sized balls. Chef tip: use a tablespoon to measure dough balls for even-sized Thattai. Keep the dough balls covered with a damp cloth to prevent them from drying out.
- Cut open a ziplock bag, lightly grease one side with oil, and place one lemon-sized dough ball on it. Flatten the dough ball slightly with your fingers.
- Cover with the other side of the bag and gently press the dough with your fingers to spread it into a thin, round disc, pressing from the middle to the outside. Alternatively, you can use a flat-bottomed bowl to press the ball evenly. Ensure the Thattai is flattened uniformly; otherwise, it may remain soft or soggy in the center. Do not press it too thin, it will break, and if you keep it very thick, it will not become crispy.
- Using a fork, prick small holes randomly on the surface to ensure the Thattai doesn't puff up like a puri and turns crispy. Prick each Thattai at least 2-3 times.
- Prepare as many discs as needed for a single frying batch and place them carefully on parchment paper.
- Heat oil for deep frying on medium flame. Once the oil is hot, gently slide in 2-3 shaped Thattai at a time. Do not overcrowd the pan. Fry on low to medium flame, flipping occasionally, until the Thattai turn evenly golden brown and crispy. They are perfectly done when the bubbles subside completely and both sides are uniformly fried.
- Remove and drain the fried Thattai on a paper towel to absorb excess oil. Allow the Thattai rice crackers to cool down completely before transferring them to an airtight container.
Leave a Reply