

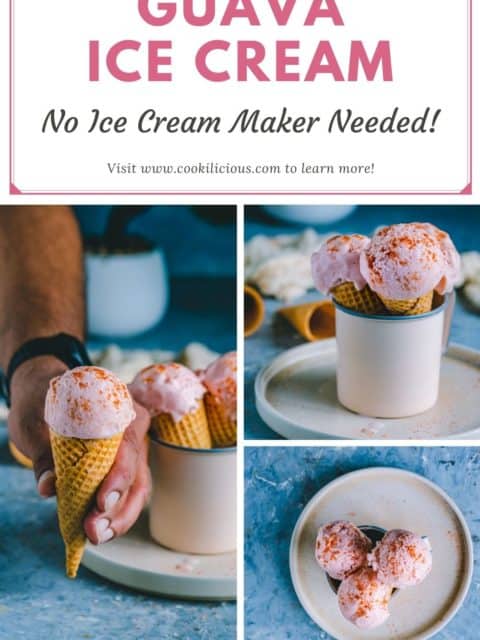
No-churn homemade Guava ice cream is a delicious Indian dessert recipe made with condensed milk and guavas. Perfect for any time of the year! A simple, quick, and easy recipe that will make you love guavas even more!
Jump to:
Ice cream is a savior
Don't you think so? If there is no dessert to serve, a tub of ice cream in the fridge comes in handy.
If you're craving a midnight snack or dealing with a bad day, there is nothing more comforting than dipping into a bowl of ice cream.
Ice creams are also great to serve at parties, get-togethers, family events, brunches, potlucks, weeknights, and weekends!
Having a tub of ice cream in the freezer is always a good idea. It makes it extra special if that ice cream is homemade! Besides this, I am currently gushing on Rabri ice cream which is simply irresistable!
Why guava in an ice cream
Legit question. I too had never heard of guava (amrood) ice cream till a couple of years back. A friend of mine introduced me to this ice cream at a local ice cream shop in Mumbai.
I had it once and became its fan for life. In fact, I converted my whole family into Guava ice cream lovers! It's truly unique ice cream and we did give Apsara Ice Cream shop a lot of sales.
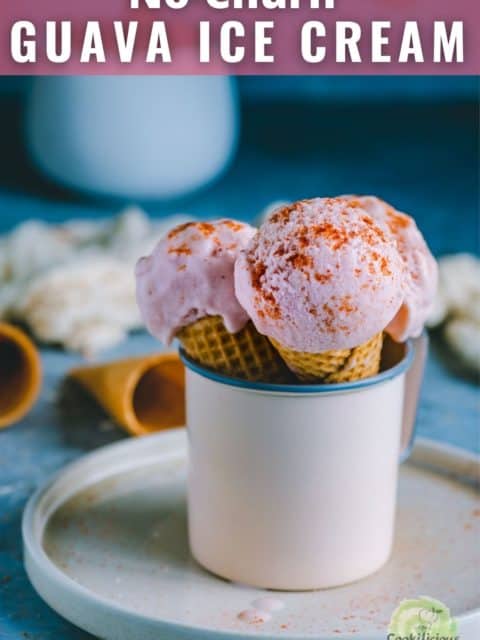
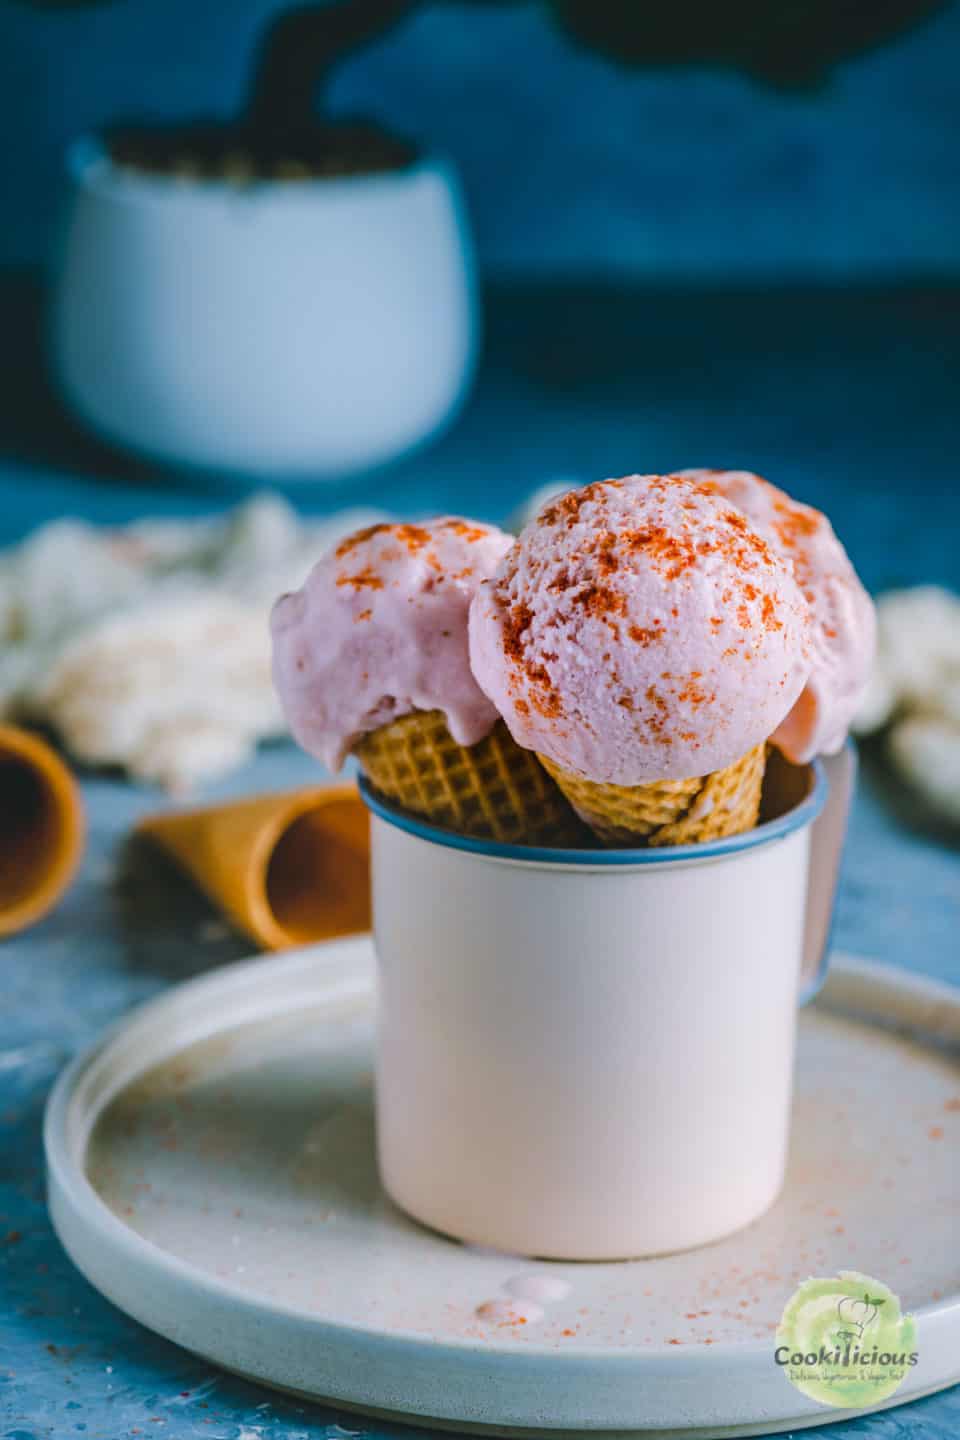
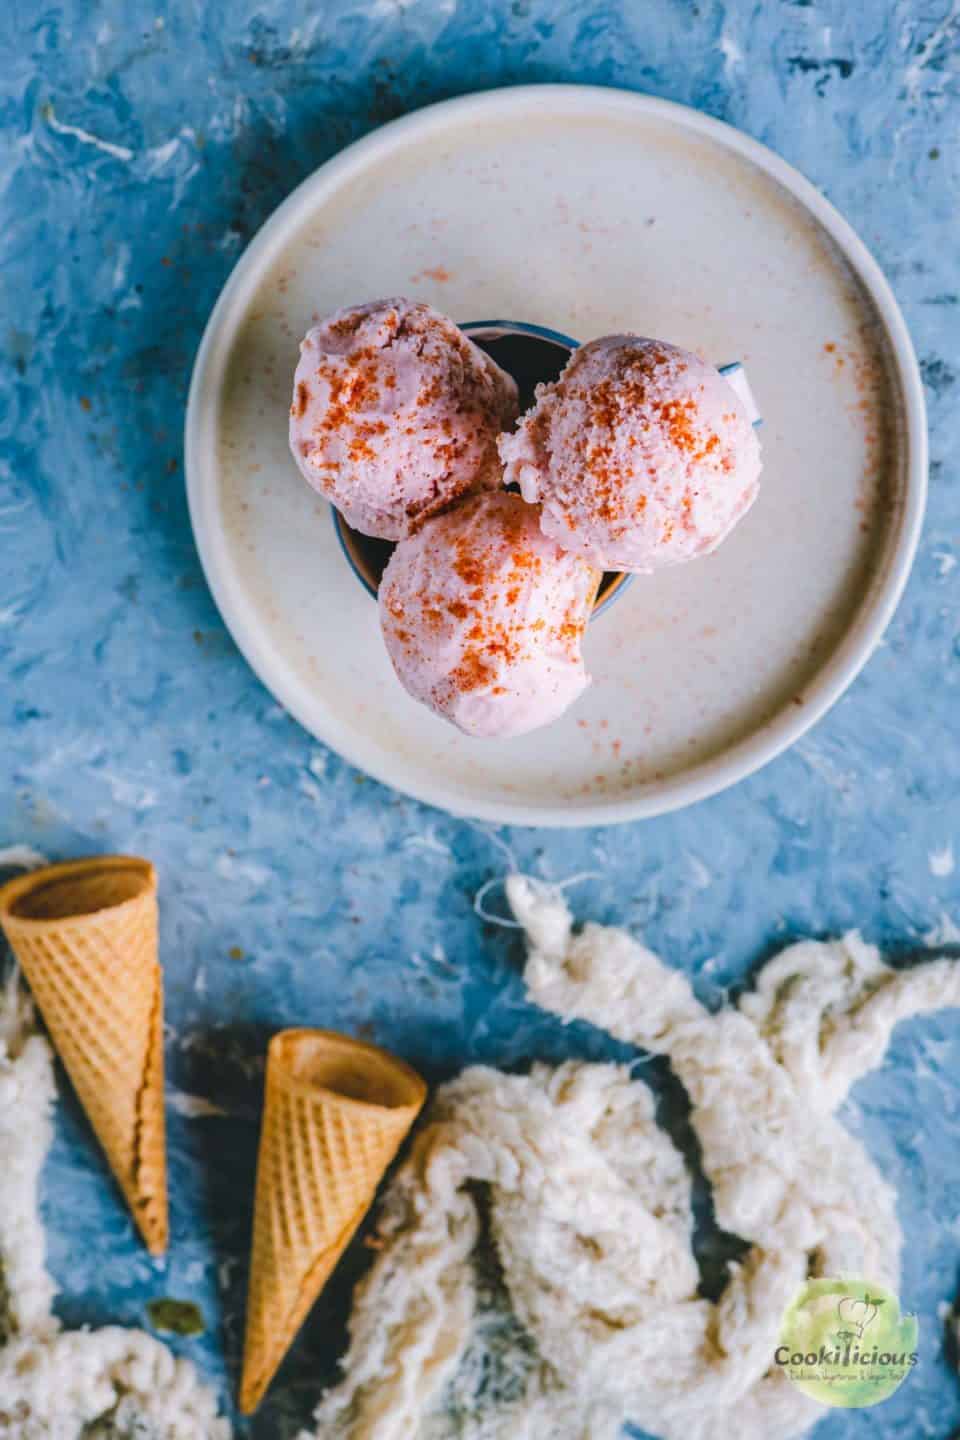
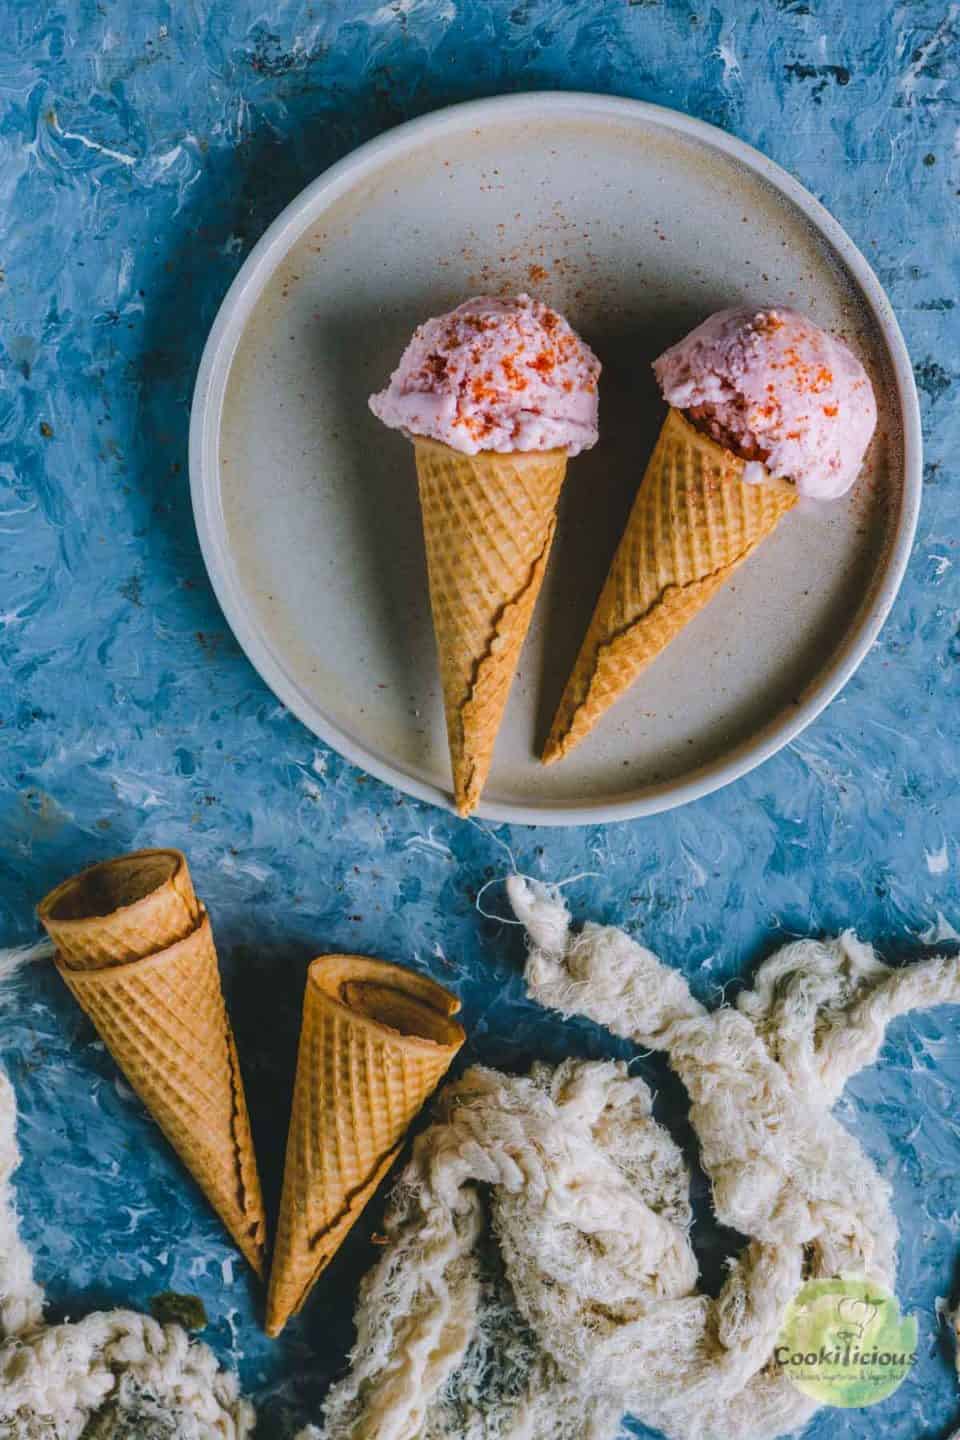
If as a child you have ever had guava slices with chilly powder and salt on top then this ice cream will transport you back to your childhood.
The whole fruit is edible and tastes like a cross between a strawberry and a pear. It is available on Amazon and in the ethnic aisles of leading grocery stores.
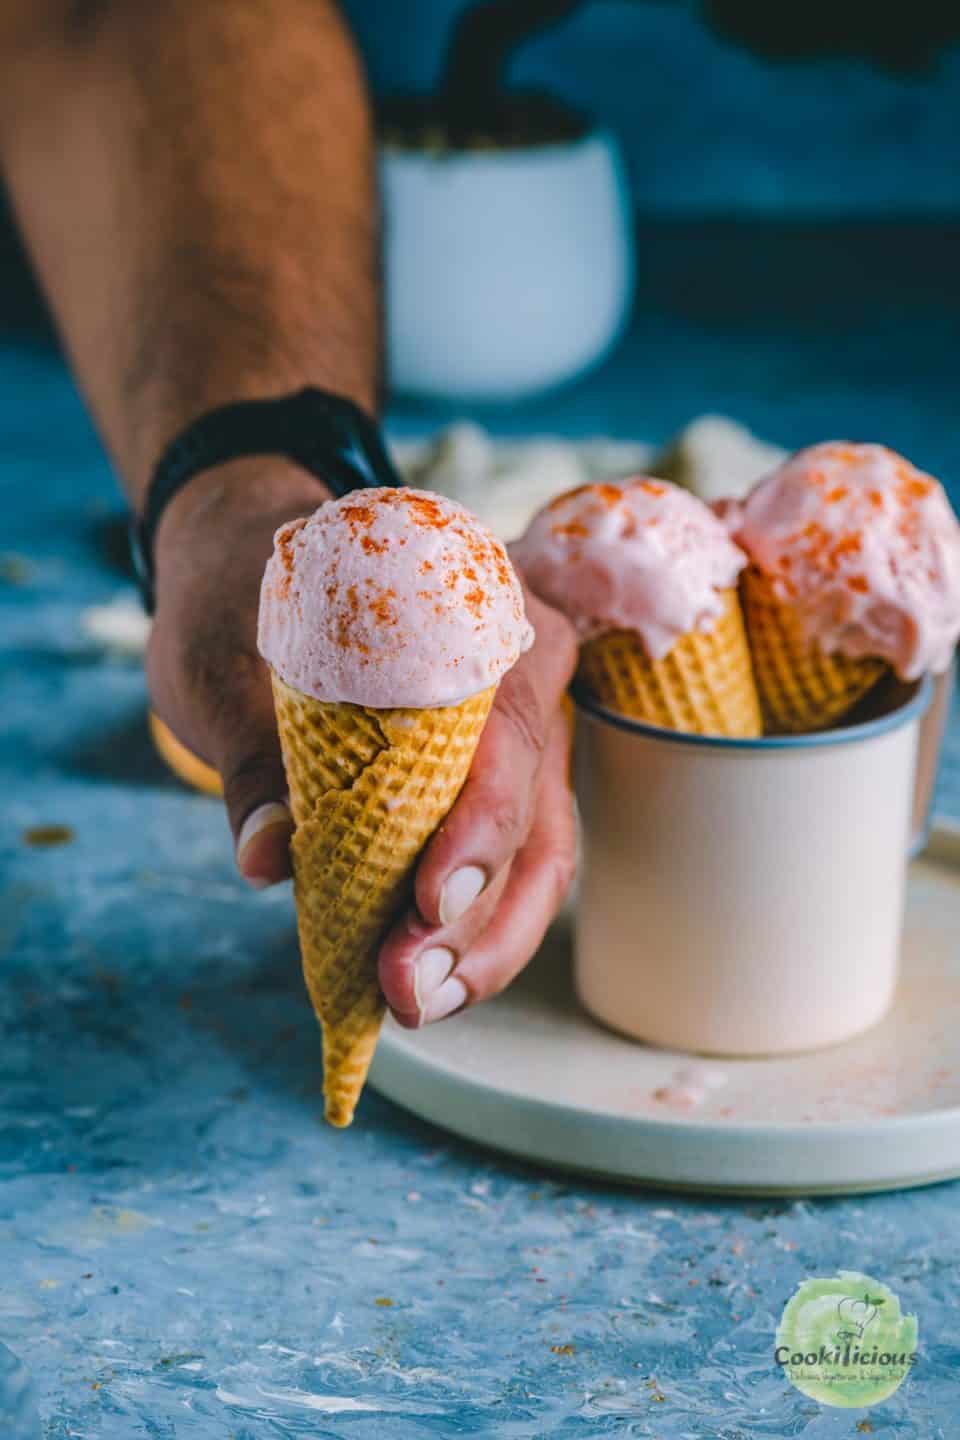
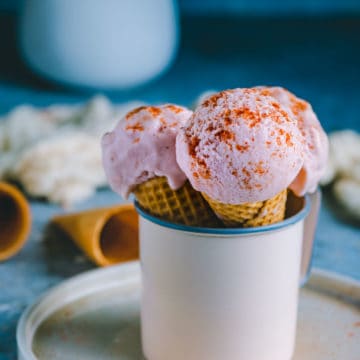
Do try this ice cream flavor at least once. Even though it's an acquired taste, you will love it. And yes, don't forget to sprinkle chilly powder on top! It's a match made in heaven!
Interestingly, guava and cream is a popular Cuban and Brazilian dessert recipe as well!
Why make this
There are many reasons why you should give the eggless tropical dessert a try! The distinctive flavor and aroma of guavas work like magic in this ice cream recipe.
- No Ice Cream Maker needed
- Needs basic pantry ingredients
- Simple and easy Indian ice cream recipe
- Great way to enjoy guavas even off-season
- A refreshing new ice cream flavor that no one can resist
Ingredients needed 🧾
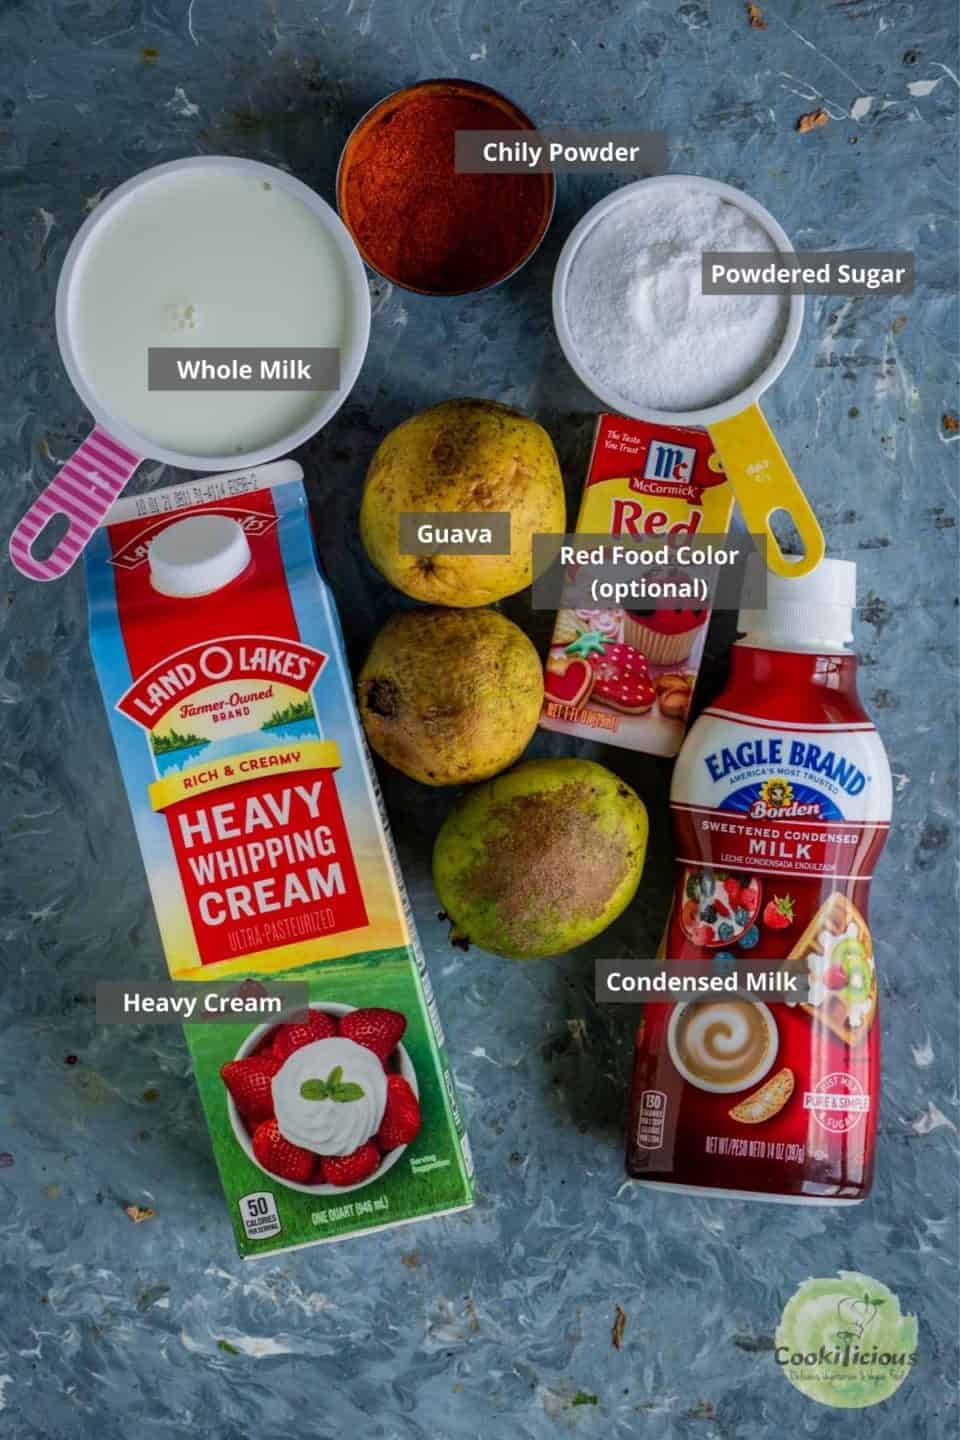
Guavas - Use fresh and ripe guavas for this recipe. Peel the skin if it's hard. If it's soft, there is no need to peel the skin. Just chop both ends.
Sometimes ripe guavas will have a slightly pink color to them. It will be soft and give under your fingers when you lightly squeeze it. Even the smell should be sweet and musky.
You can find them at any grocery store or on Amazon. If you don't have access to fresh fruit, you can also use frozen guava or ready guava pulp that's more easily available.
Whole milk - Use full-fat whole milk for this recipe. It helps in making the ice cream creamy and smooth.
Condensed milk and Heavy cream - Give this homemade ice cream a smooth creamy texture especially since this is a no-churn ice cream recipe.
Powdered sugar is used in this recipe. It also helps in getting the right ice cream texture. You can use any variety of sugar.
Chilly powder, salt, and black salt are used for garnish.
Red Food color - This is optional. If your guavas are not pink inside, only then add food color.
How to make it 🔪
Want to save this recipe?
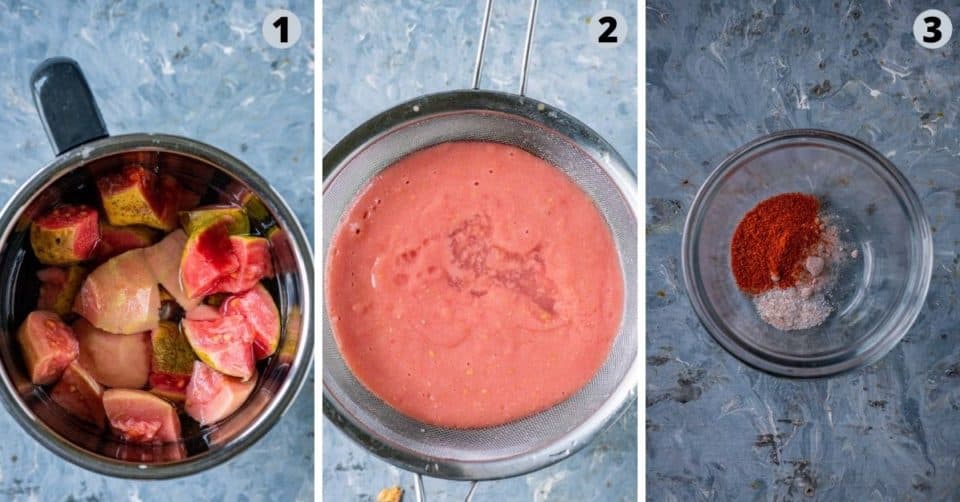
- The first step is to prep the guavas. If the skin is too hard, peel the skin. Else, chop them with the skin. Slice the guava in half, after cutting off the stem and bottom. Chef Tip - Transfer to a blender and add water. Reserve some slices for garnish if you want.
- Blitz to make a smooth puree. Pass it through a sieve to discard the seeds and keep it aside for now. Add food color (if adding) now. You can also refrigerate it as needed.
- Prepare the garnish by mixing chilly powder, salt, and black salt. Keep it aside as well.
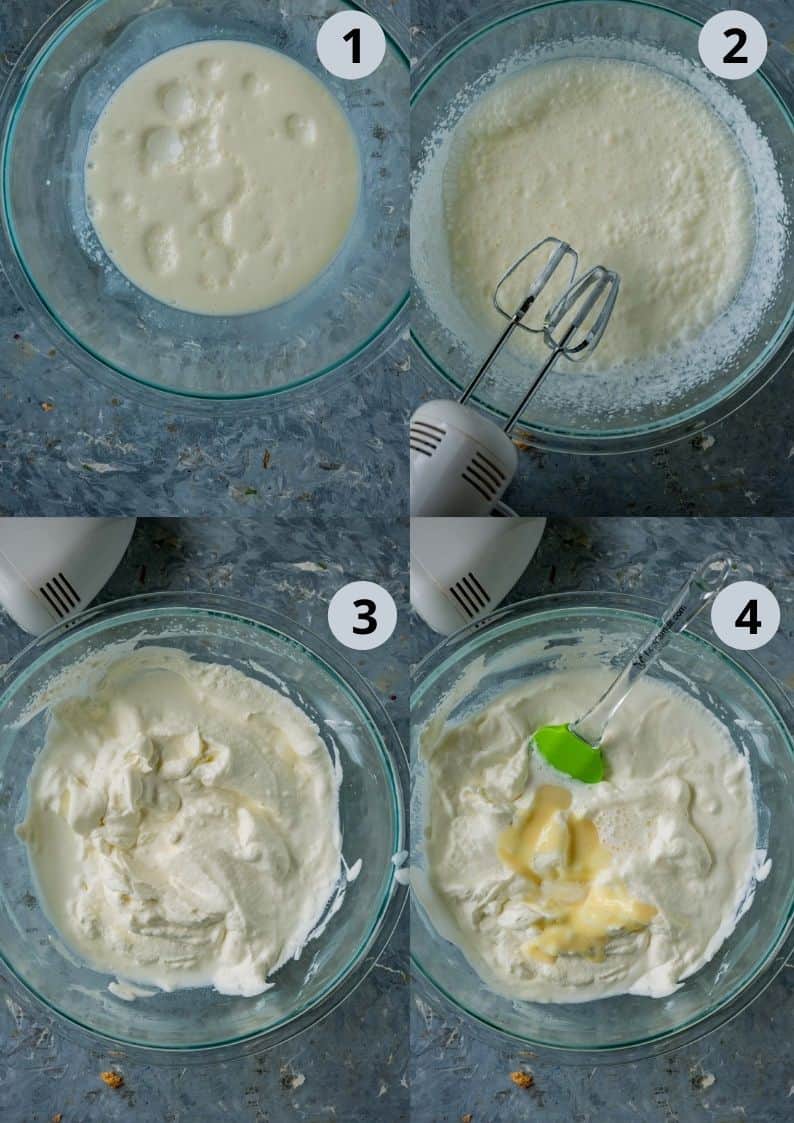
- Add heavy whipping cream (straight from the fridge) to a mixing bowl.
- Using an electric beater, pulse it. You can also do this using a whisk.
- Beat till it forms soft peaks and is double in volume. Be mindful of scrapping the edges as you beat.
- Add chilled whole milk and condensed milk.
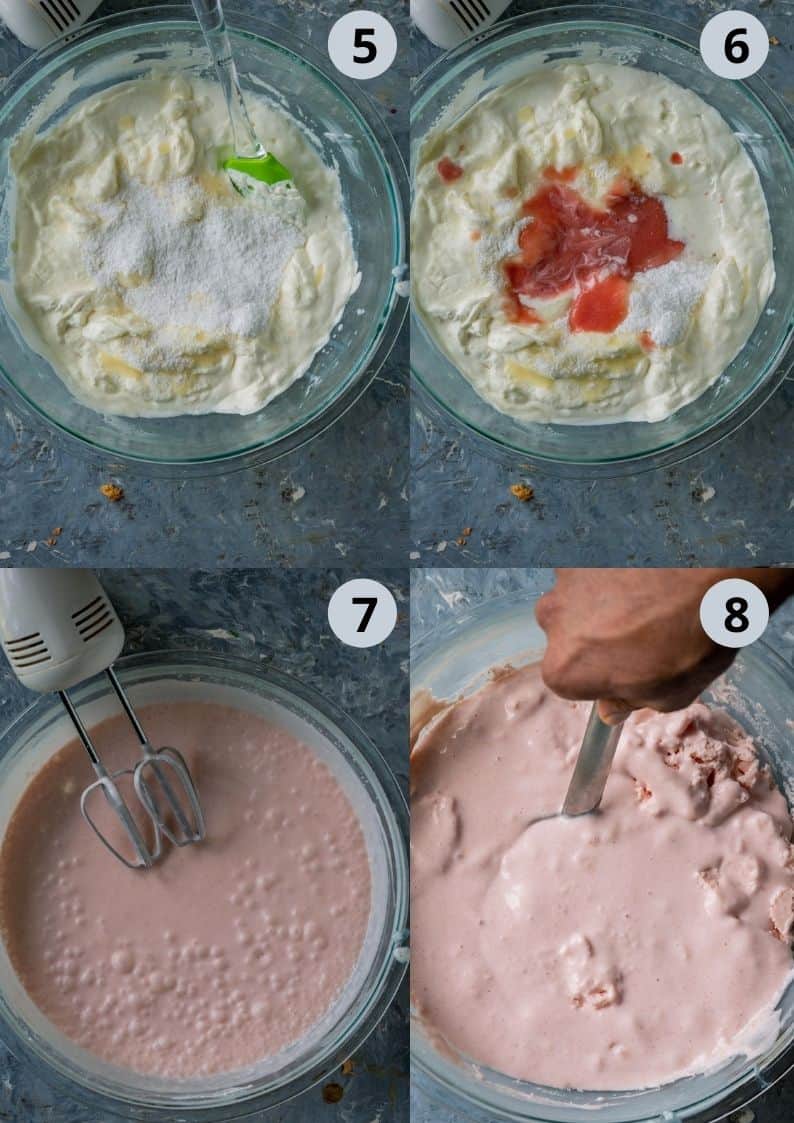
- Also, add powdered sugar to the bowl.
- Next, add the guava puree. If you had reserved some guava slices, chop them finely and add them to the bowl at this point.
- Mix and continue to beat it till it's all well combined. When you see bubbles on top, give it a light mix to dissolve the bubbles.
- Transfer the bowl to a freezer. No need to cover. Let it freeze for 2-3 hours. Then take it out and using a spatula, break the ice cream and stir it all over. Chef Tip - This is done to prevent the ice crystals from forming. You can enjoy the ice cream right away as a soft serve if set. Else, freeze it again for 2 more hours.
Serving suggestions 🍽
Once set, take it out of the freezer and let it sit out at room temperature for 5-10 minutes to soften slightly before scooping.
Additionally, dip your ice cream scooper in warm water before scooping. It helps.
Serve up a scoop or two of this Indian ice cream in serving bowls, sprinkle the prepared garnish on top, and enjoy this chilled treat!
Additionally, you can also sprinkle some toasted fresh coconut or toasted almonds to give a little crunch.
Serve this guava dessert at your next party and watch your guests go crazy over it! This eggless ice cream can be served for any occasion!
Top recipe tips 💭
If you want, add a teaspoon of vanilla extract along with the puree, for an enhanced flavor. Use little evaporated milk to reduce the amount of cream used.
If you don't have access to fresh fruit, you can also use frozen guava or ready guava pulp or paste that's more easily available.
Add red food color only if the insides of the guava are not pink. You can also skip adding food color. The color of your ice cream will not have a pink hue then.
Do not skip the garnish. It gives this ice cream a certain flavor that you can't beat. You can also make this guava recipe in an Ice Cream Maker.
Recipe FAQs 📖
This no-churn Indian chilly guava ice cream stays good in the freezer for 5-6 months. Just store it in an Ice Cream container that comes with a lid.
If you want to make homemade vegan guava ice cream, you can use coconut milk, vegan whipping cream, and coconut condensed milk.
The rest of the ingredients are naturally vegan-friendly in this no-churn ice cream recipe.
More ice cream recipes

⭐️ Subscribe to the Cookilicious Newsletter and receive new recipes straight to your inbox! You'll receive my FREE Vegan Beginner's guide as a gift. Ready to elevate your cooking game? Purchase my Cookbook - The Essential Vegan Indian Cookbook today!
Recipe 📖
Guava Ice Cream (No-Churn Recipe)
Equipment
- Electric Beater
Ingredients
- 3 Guava / Amrood
- ½ cup Water
- 1 cup Heavy Whipping Cream
- 1 cup Milk
- 1 cup Condensed Milk
- ½ cup Sugar
- 1 tablespoon Salt
- 1 tablespoon Chili Powder
- ½ tablespoon black salt
Instructions
- The first step is to prep the guavas. If the skin is too hard, peel the skin. Else, chop them with the skin. Slice the guava in half, after cutting off the stem and bottom.
- Transfer to a blender and add water. Reserve some slices for garnish if you want.
- Blitz to make a smooth puree. Pass it through a sieve to discard the seeds and keep it aside for now. Add food color (if adding) now. You can also refridgerate it till needed.
- Prepare the garnish by mixing chilly powder, salt and black salt. Keep it aside as well.
- Add heavy whipping cream (straight from the fridge) to a mixing bowl. Using an electric beater, pulse it. You can also do this using a whisk. Beat till it forms soft peaks and is double in volume. Be mindful of scrapping the edges as you beat.
- Add chilled whole milk, and condensed milk.
- Also add powdered sugar to the bowl. Next, add the guava puree. If you had reserved some guava slices, chop them finely and add to the bowl at this point.
- Mix and continue to beat it till it's all well combined. When you see bubbles on top, give it a light mix to dissolve the bubbles.
- Transfer the bowl to a freezer. No need to cover. Let it freeze for 2-3 hours.
- Then take it out and using a spatula, break the ice cream and stir it all over.This is done to prevent the ice crystals from forming.
- You can enjoy the ice cream right away as a soft serve if set. Else, freeze it again for 2 more hours.
- Once set, take it out of the freezer and let it sit out at room temperature for 5-10 minutes to soften slightly before scooping.
- Once set, take it out of the freezer and let it sit out at room temperature for 5-10 minutes to soften slightly before scooping. Additionally, dip your ice cream scooper in warm water before scooping. It helps. Serve up a scoop or two of this Indian ice cream in serving bowls, sprinkle the prepared garnish on top, and enjoy this chilled treat!

Lucy says
I already have guava purée from my home grown guavas. Do you think 1 cup of my purée is equivalent to the 3 guavas in your recipe?
Priya says
Yes, that should be good. Hope this helps.
Sonali says
Hi Priya.
We love the Apsara guava icecream. Not living in India, we only enjoy this when visiting. I picked some guavas off a tree in our complex and thought about it and then stumble upon your blog! Mission accomplished and thoroughly enjoyed! Taste of Mumbai in our home ! Thank you for your generosity in sharing this recipe…
Priya says
Hi Sonali! I am so glad you liked it. That's exactly why I made it! Being away from home, I missed that ice cream a lot. So when my neighbor gave me guavas from her tree, I knew what I had to make! Thank you so much for your kind words. 🙂
T says
Do you have the amount of guavas needed in grams?
Priya says
No. Just use regular sized guavas. Hope this helps.
Hau’oli says
We have an abundance of wild guava growing on our property and as soon as I found your recipe we knew we had to try it. Not only did we love it, but I’ve made it 3 more times and shared it with the neighbors too. Mahalo for the killer recipe!!
Priya says
That makes me so happy! Glad you all enjoyed this ice cream recipe. 🙂 Thank you so much.
Hau’oli says
I just made the vegan version of this (using your above tips) and it’s just as luscious and lip-smacking as the original! Mahalo, mahalo, mahalo!
Priya says
Yay! thank you so much 🙂