

Follow these step-by-step instructions on how to make an idli batter recipe using idli rava and lentils. These vegan steamed cakes are soft, fluffy, and healthy! This South Indian delicacy is popular all around the world. It can be served as a snack or for breakfast!
What's an Idli
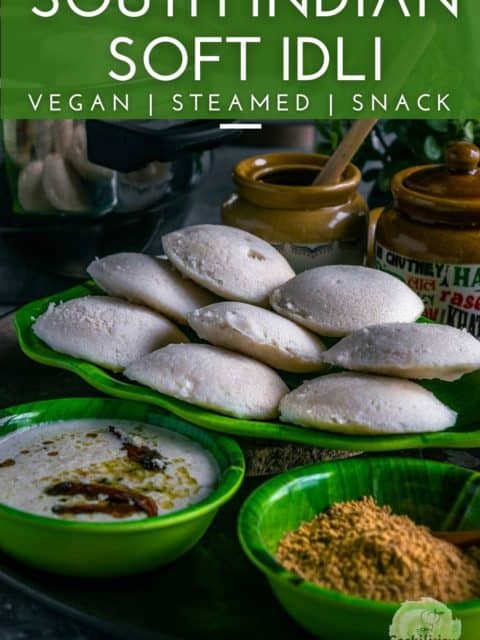
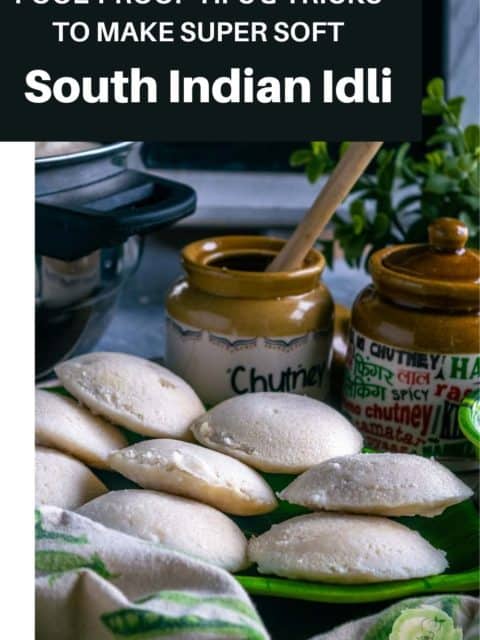
Idlis are savory steamed cakes made out of fermented rice and lentil batter. They are mildly flavored, soft, fluffy in texture, and highly nutritious. They are almost always round disc-shaped and white in color. It is one of the most loved South Indian delicacies that is enjoyed all around the world.
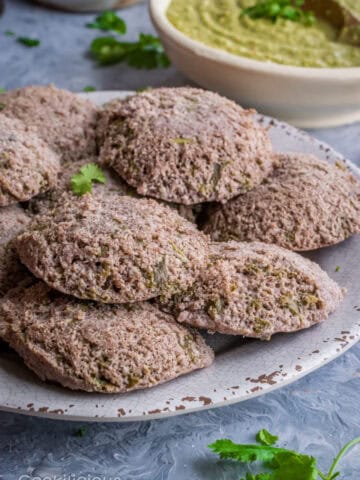
Most Indian restaurants anywhere in the world will have Idli on their menu, especially for breakfast or a snack! For us, it's like comfort food. Whenever we travel anywhere, idli is one of the safest dishes to order at restaurants. Over time, there have been many variations to this South Indian delicacy and in fact, I have shared some too - Rava Oats Idli, Mini Masala Idli, Teff Idli, and Ragi Kale Idli.
Healthy Idli Recipe
Why make them
I always like to have some kind of batter in the fridge. It becomes very easy to quickly put together a meal. For us, in batters, idli batter and dosa batter top the list. So we keep alternating between these two. This is my go-to idli batter recipe for years now. It's a family recipe and I can pretty much make it in an auto mode now.
- They are very healthy and protein-packed
- A very simple recipe using pantry basics
- Is naturally vegan, gluten-free, and cooked oil-free
- extremely low-calorie, and probiotic.
- Since it's steamed, it makes it very easy to digest
- Perfect travel food
- One of the safest beginner solid food for kids
In this post, I will share with you all the tricks and tips I know and have learned over the years. The making of the idli recipe is actually a three-step process. Soaking, grinding, and fermenting. Each step is crucial to the final outcome and needs to be done correctly.
It also depends on the proportion of ingredients, consistency of the batter, and the weather to help in the fermentation. Since the grinding of the batter is an essential step in the idli-making process, I am very particular about what grinder to use. The traditional Idli/Dosa tabletop wet grinders are large and heavy. My mom used it but I never got one here.
Ingredients needed 🧾
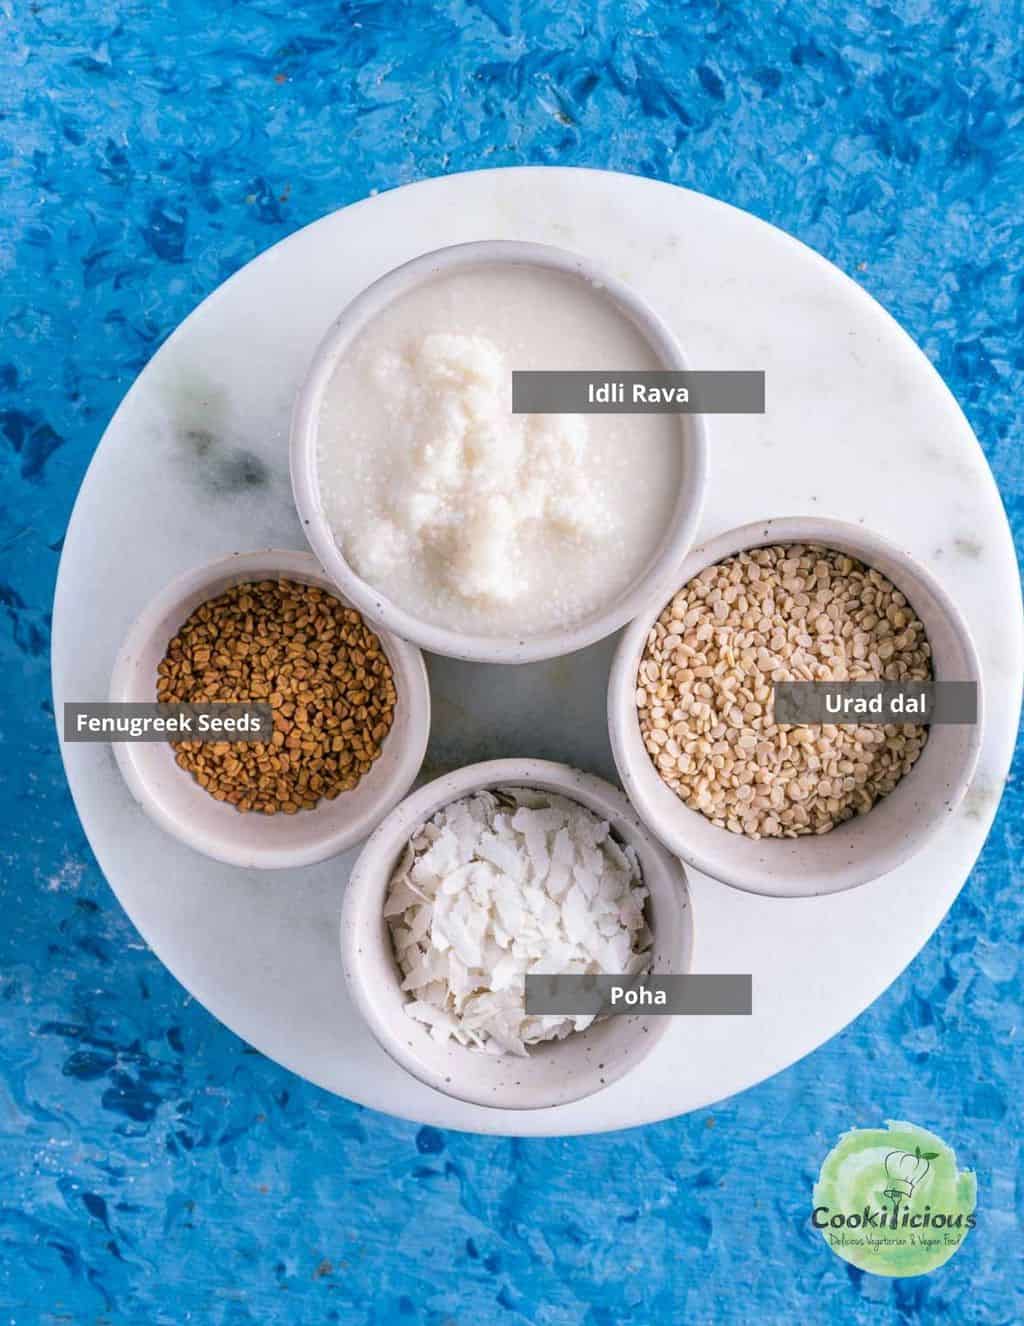
These are the 4 main basic ingredients that you would need to make soft and spongy idlis.
Idli Rava or parboiled rice is one of the key ingredients in this recipe. You can substitute idli rava with regular raw rice or brown rice but that will alter the result. It is easier to digest and better in terms of nutrition than raw rice. It can be found in Indian grocery stores or on Amazon.
Urad Dal - You can use whole or split urad dal. If using whole, reduce the quantity to half. The lentils help in binding, lend to the taste, and are healthy.
Poha or Flattened Rice - Thick or thin poha can be used here. Adding poha to the batter helps make soft, fluffy idli.
Fenugreek/Methi Seeds or Vendayam - I have always been told by elders that vendayam helps in making Idlis super soft. However, there is a scientific reason as well. Fenugreek seeds contain compounds high in beta-glucans which help hold carbon dioxide. That is what makes the idlis fluffy and soft. They also give viscosity to the batter and aid in the fermentation process.
Apart from these ingredients, I also use rock salt instead of regular table salt. Table salt contains other ingredients such as anti-caking agents etc which may interfere with fermentation. So best not to use that.
Besides the ingredients, another thing unique to making idli is the gadget - Idli Cooker. You can either use any pressure cooker or steamer with idli molds or use a cooker made especially for making idlis.
How to make it 🔪
Want to save this recipe?
Although the process to make idli batter recipe spreads across a couple of days but trust me, it's minimal effort.
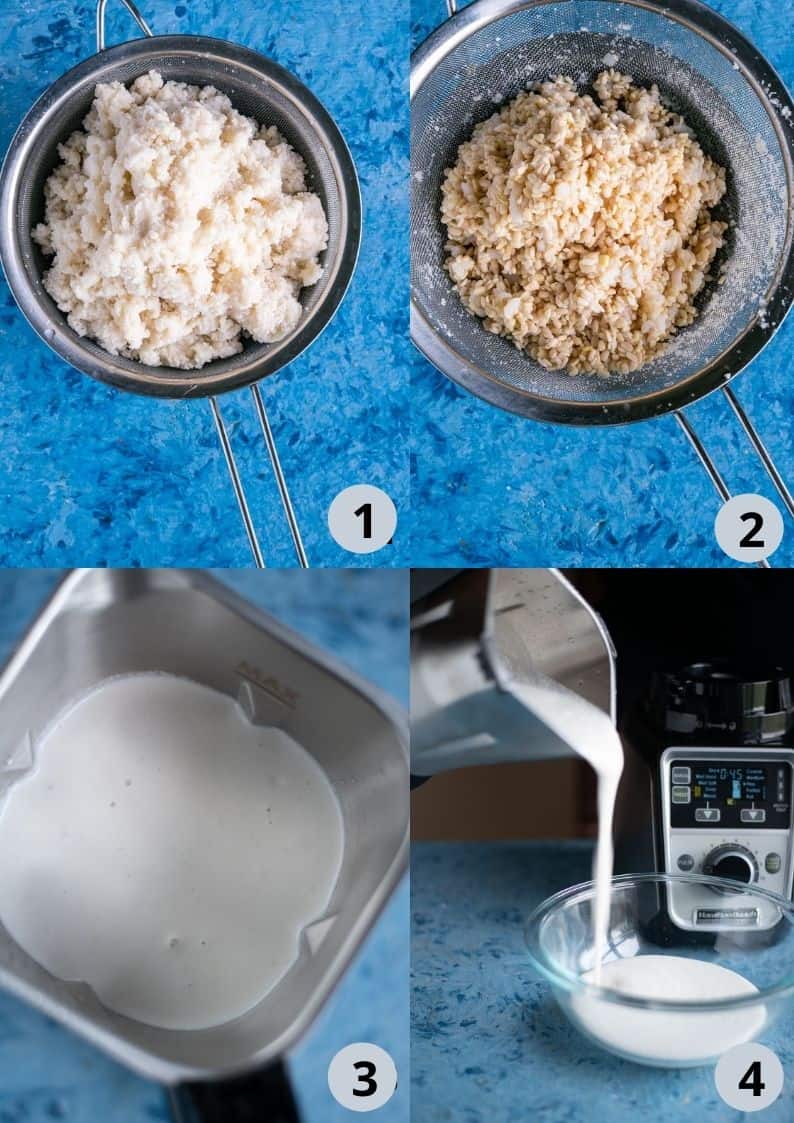
- The first step in this idli recipe is to soak all the ingredients. Rinse idli rava in a strainer first. Soak it in water for about 5-6 hours. You can also leave it overnight.
- Similarly, rinse urad dal, methi seeds, and poha in a strainer under running water and then soak them all together in a bowl for 8 hours.
- Drain the water from idli rava and transfer it to the Hamilton Beach Blender Jar. Grind to a smooth paste by adding very little cold water gradually. Transfer to a bowl. Similarly, drain the water from urad dal, methi seeds, and poha. Transfer to the same blender jar and grind it. Add cold water gradually only if needed to grind. The dal should fluff up and fill the grinder.
- Pour the batter into a bowl.
The next key step is fermentation. The fermentation of Idli batter is carried out largely by lactic acid bacteria. Not yeast. However, the process to ferment is all-natural with minimal involvement.
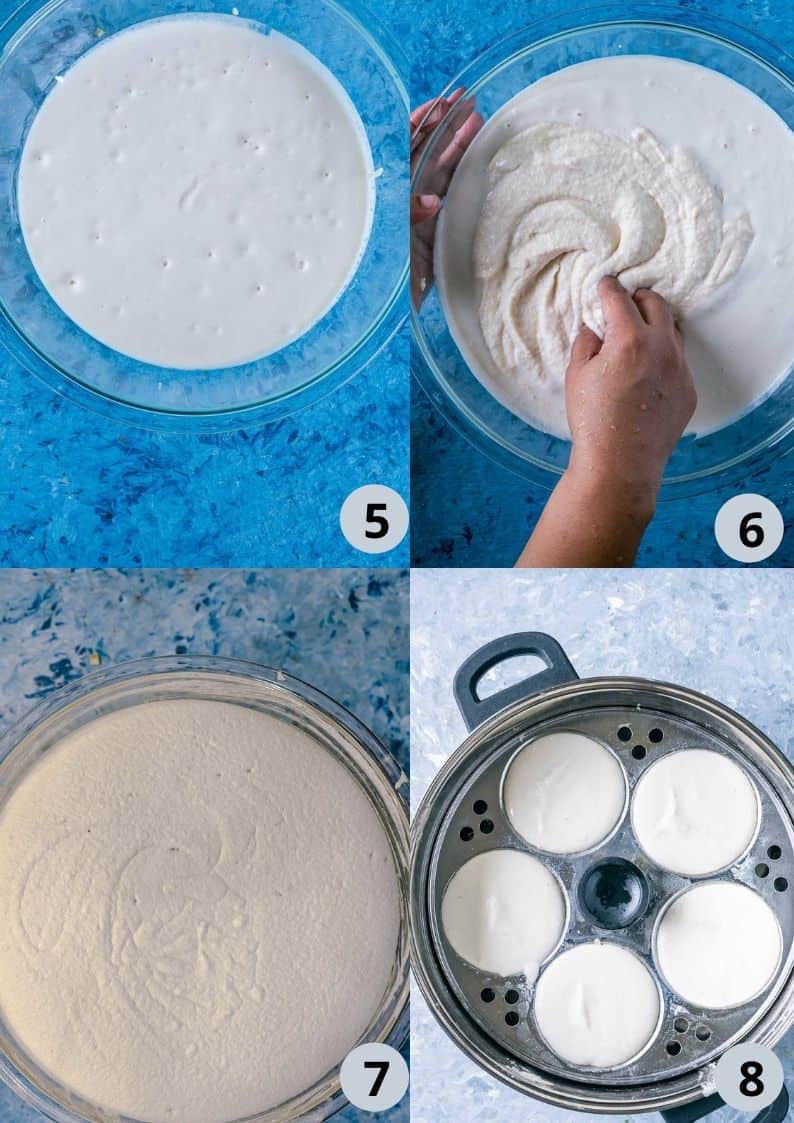
- Add salt to the prepared batter.
- Mix both batters together using your clean hand. The warmth in our hands helps with the fermentation. You can also mix it with a spoon instead. Chef Tip - The batter should be of thick pouring consistency. Add little water if it's too thick.
- Place the (uncovered) bowl in a warm, dry area for 8 hours or overnight. I usually place it in my turned-off oven with a plate underneath it. Chef Tip - I do that to save myself from cleaning the oven in case the batter overflows. I also leave the oven light on. After 8 hours, you will notice the batter has risen and has a slight sour smell to it. If it has not risen enough, leave for a couple of more hours. Using a spoon, give the batter a quick mix and then place the bowl in the fridge to use as and when needed.
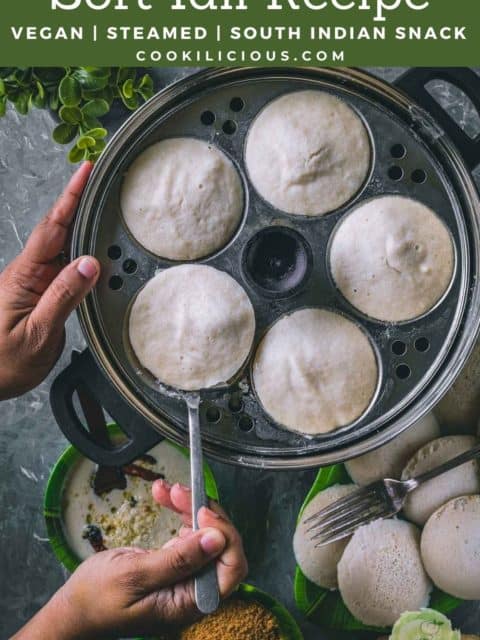
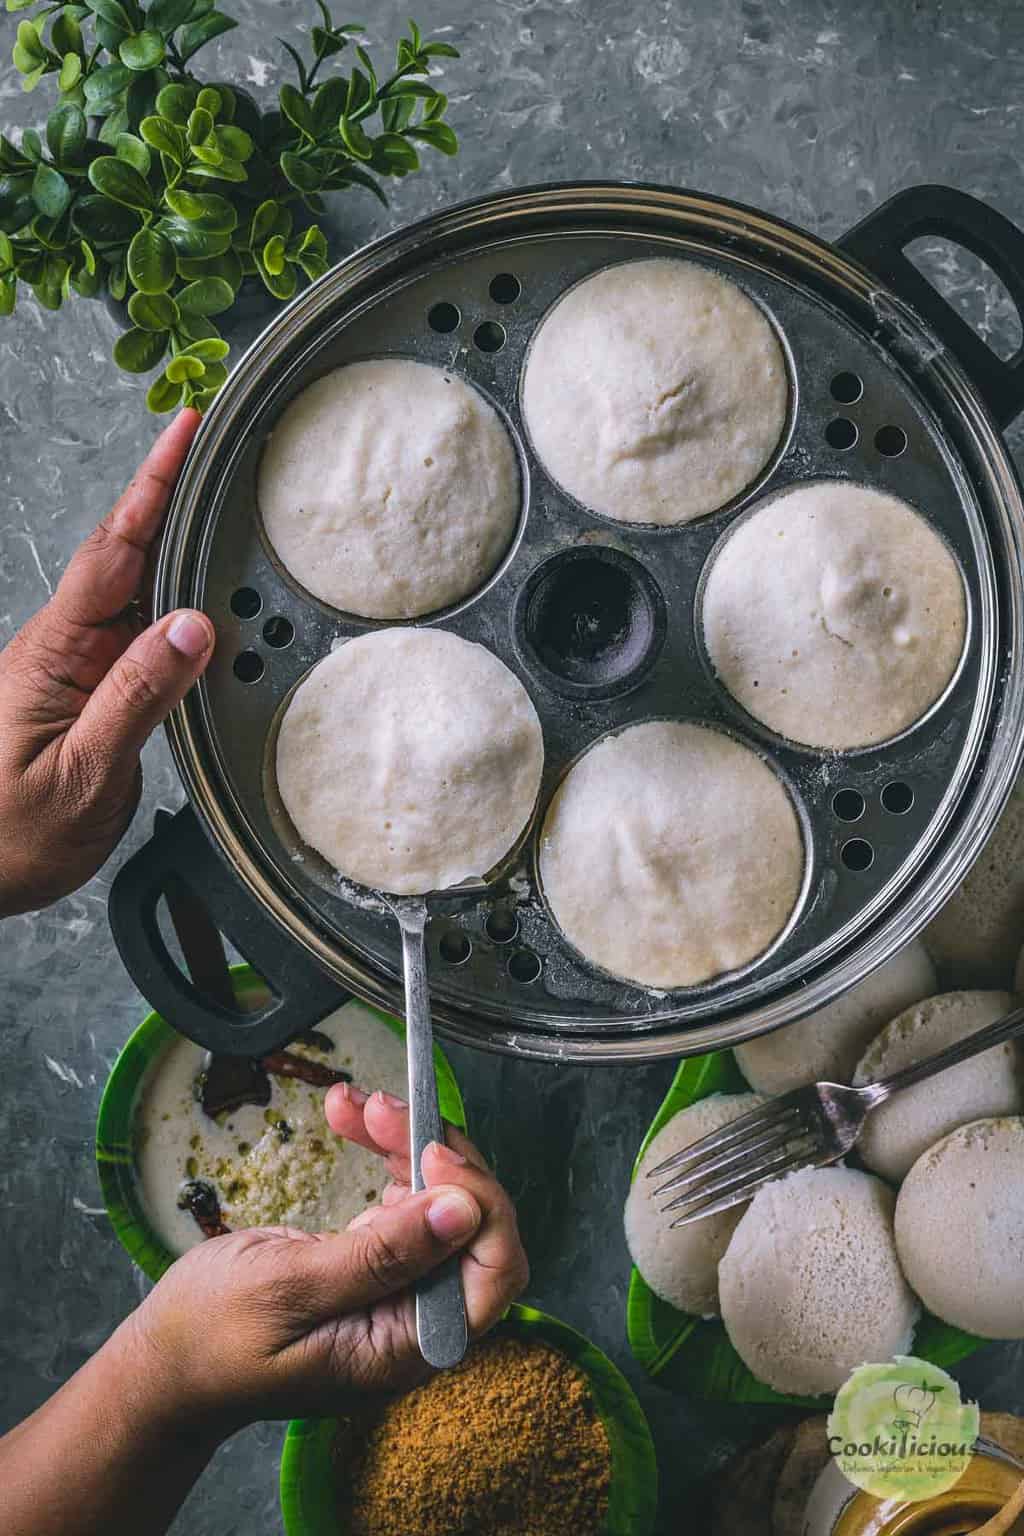
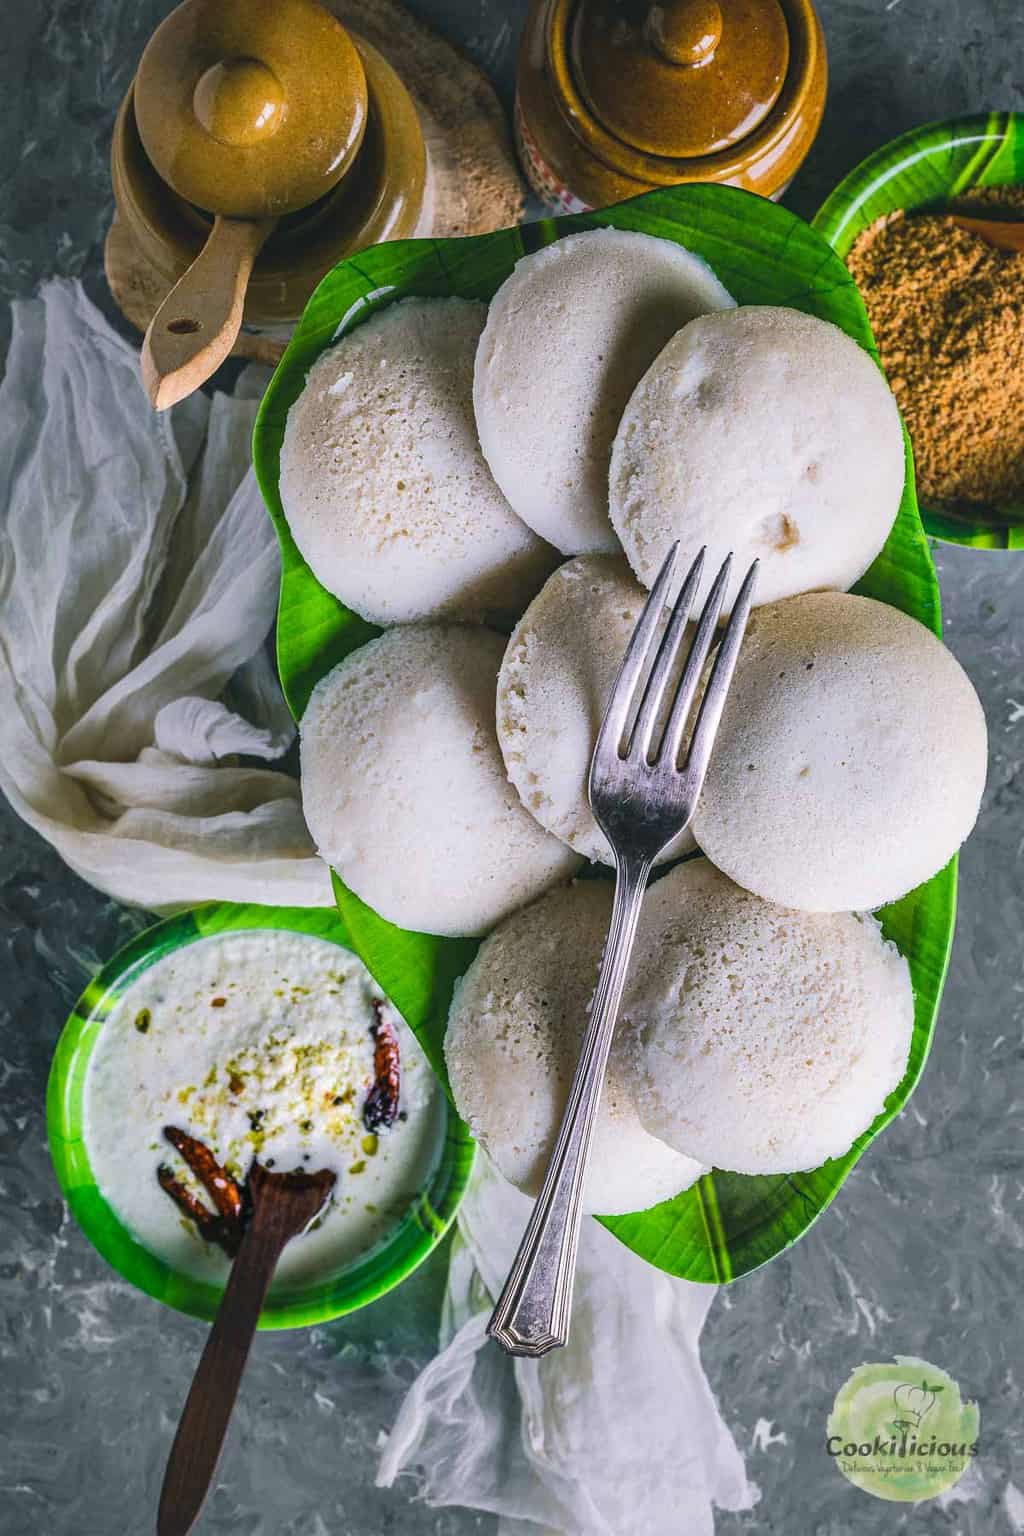
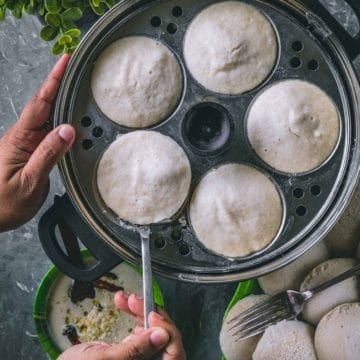
- When ready to use, take them out of the fridge. Grease the idli molds with cooking spray. Then pour the batter into the molds. Alternatively, you can also line the molds with silicone liners. Removing idlis becomes very easy plus no greasing or cooking spray is needed. Chef Tip - Add a little water to the bottom of the Idli cooker, Instant Pot, or pressure cooker. Then place the idli plates on top. Steam them for 10-11 minutes. Chef Tip - Do not allow it to overcook. It might become hard and dry. Do not remove them from the molds immediately. It might stick. Leave it for 4-5 minutes, sprinkle water on them, and then spoon it out carefully.

Serving Suggestions
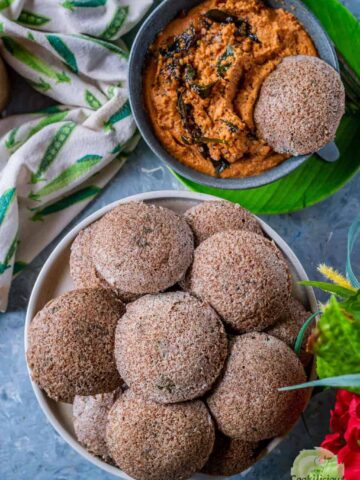
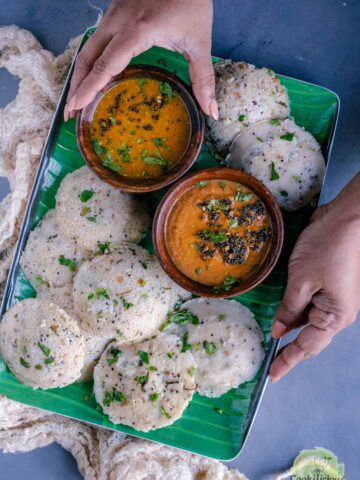
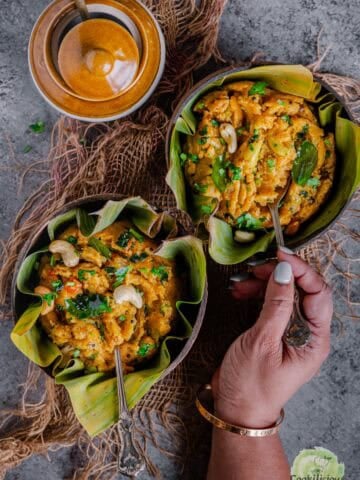
Idli is best served hot or warm with filter coffee. It's often paired with South Indian Coconut Chutney, Idli Molgapodi, and/or Sambhar because Idli by itself is very bland. In fact, I have a category for condiments that you can choose from. My dad would enjoy his plate of idli with hot rasam on top. You can try this Rasam Idli combo too.
With leftover idli, you can make Idli Upma similar to Quinoa Upma. Just use broken idli pieces instead of quinoa. Fried Idli is another way to serve them. Cut them into pieces and deep-fry them in oil and serve. leftover idli batter can also be used to make Kuzhi Paniyaram.
Idli can be served for breakfast, snacks, or a meal. You can pack them in lunchboxes and also take them along when traveling. Trust me, this idli recipe is a keeper! Save this recipe.
Top recipe tips
Always grind urad dal and idli rava separately and then mix them together to get soft and fluffy idli. The reason is that they both need different times to grind. To make these idlis protein rich, add grated or crumbled tofu or paneer to the batter along with hemp seeds. You can also add minced veggies.
Recipe FAQs
Idli batter stays well in the fridge for a week. I usually prepare my batter over the weekend to use it throughout the week. It can also be frozen for up to 2 months. Just transfer it to an airtight container. The frozen batter should be thawed 24 hours in the refrigerator before use. Cooked idlis can last up to 2 days. That is why it's a great snack to take along on long-distance travel.
While you can easily find idli rava in any Indian grocery store or on Amazon. In case you don't have it handy, use regular rice in place of idli rava. If you have some leftover cooked rice, you can use that instead of poha and grind it. Similarly, you can also use soaked tapioca pearls or sabudana here.
Idli batter can be used to make dosa. Thin it down a bit and use.
But for making idlis out of dosa batter, add little rice flour to the batter if it is too thin.
No. Idli batter has to ferment and rise naturally. There is no need to add baking soda or powder. Note, in winter especially, you may have to keep the batter longer to ferment. This time you can also add ½ teaspoon of baking soda and then ferment the batter. Some like to add a teaspoon of sugar to the batter to help with fermentation.
When the salt is not added in the right amount, it causes the batter to not ferment. That is why it's important to add salt before the fermentation process and not after. In such cases, pour lukewarm water onto a plate and then place the batter bowl over it. Keep this in the turned-off oven to ferment. If the batter didn't ferment at all, add Eno fruit salt and try making Idlis. Alternatively, you can use the batter to make dosa.
You should be able to see a rise in its volume. Plus, it should also start to smell slightly sour and become thick, and foamy.
This happens if the batter is very thin and not well fermented. Always be cautious while adding water when making the batter. The thin watery batter will not rise and the idlis will end up hard and flat. So do not add too much water while grinding.
Disclaimer - I am yet to try this method.
Select the yogurt option and use the less mode. Place a small trivet in the IP steel insert. Keep the bowl with the batter on that trivet.
Cover and keep the vent position to venting. You can also use any glass lid instead. Set the time for 8-9 hours. Fermentation will depend upon the weather.
On warmer days, it will ferment quickly. On colder days, it may take a couple of hours more in the Instant Pot.
You can very well make Mini Masala Idli or even Chettinad Kuzhi Paniyaram using this batter. This batter can also be used to make Potato Dosa, Uttapams, or Dosa Waffles. Even making dhokla using this batter is a good idea.

⭐️ Subscribe to the Cookilicious Newsletter and receive new recipes straight to your inbox! You'll receive my FREE Vegan Beginner's guide as a gift. Ready to elevate your cooking game? Purchase my Cookbook - The Essential Vegan Indian Cookbook today!
Recipe 📖
Idli Batter Recipe With Idli Rava
Equipment
- Idli cooker - or Steamer
Ingredients
- 2 cups Idli Rava
- ½ cup Split Urad Dal
- ¼ cup Poha
- 1 teaspoon Fenugreek Seeds
- Rock Salt
- Water as needed
Instructions
- Rinse idli rava in a strainer first. Then soak idli rava in water for about 5-6 hours. You can also leave it overnight.
- Similarly, rinse urad dal, methi seeds, and poha in a strainer under running water and then soak them all together in a bowl for 8 hours.
- Drain the water from idli rava and transfer to the Hamilton Beach Blender Jar. Grind to a smooth paste by adding very little cold water gradually.
- Pour the batter into a bowl. Then drain the water from urad dal, methi seeds, and poha.
- Transfer to the blender jar and grind it similarly. Add cold water gradually only if needed to grind. The dal should fluff up and fill the grinder.
- Pour that idli batter into the bowl. Add salt.
- Mix both the batters together using your clean hand. The warmth in our hands helps with the fermentation. But you can also mix it with a spoon instead.
- The batter should be of thick pouring consistency. Add little water if it's too thick.
- Place the (uncovered) bowl in a warm, dry area for 8 hours or overnight. I usually place it in my turned-off oven with a plate underneath it.
- I do that to save myself from cleaning the oven in case the batter overflows. I also leave the oven light on.
- After 8 hours, you will notice the batter has risen and has a slight sour smell to it. If it has not risen enough, leave for a couple of more hours.
- Using a spoon, give the batter a quick mix and then place the bowl in the fridge to use as and when needed.
- When ready to use, take them out of the fridge. Grease the idli molds with cooking spray. Then pour the batter into the molds.
- Alternatively, you can also line the molds with silicone liners. Removing idlis becomes very easy plus no greasing or cooking spray needed.
- Add a little water to the bottom of the Idli cooker, Instant Pot, or pressure cooker. Then place the idli plates on top. Steam them for 10-11 minutes.
- Do not allow it to overcook. It might become hard and dry. Do not remove them from the molds immediately. It might stick. Leave it for 4-5 minutes, sprinkle water on them, and then spoon it out.
- Idli is best served hot or warm. It's often paired with South Indian Coconut Chutney, Idli Molgapodi, and/or Sambhar.

Ninnja says
This recipe has been a game-changer for us! It is authentic and actually works! Thankyou for this recipe (and the others too).
Priya says
Thank you so much. Glad you liked it. 🙂
Jess says
I love trying new recipes with my kids from different cultures. Thank you for sharing this recipe!
Priya says
Thank you so much.
Angela says
This recipe sounds amazing. You have so much great information and your step by step pictures are wonderful!
Priya says
Glad you liked it. Thank you
Maria says
Honestly, I didn't try this before. That's why I'm so thrilled to try this with my husband <3 I'm sure we'll gonna love it for sure! thank you for the clear and very easy steps 🙂
Priya says
Thank you
Dannii says
I have never heard of these before, they look amazing. I will definitely be giving them a try.
Priya says
Yes, they are delicious. Thank you
Marlynn says
Your detailed notes on how to make this are very helpful. Thank you! And the blender sounds like a good one. I'll have to check it out.
Priya says
Thank you so much
Cathleen says
I love all the notes you have on this recipe. It was very useful! Will definitely be a regular recipe to make in my house 🙂
Priya says
Thank you so much
Whitney says
This will perfectly pair with my curry recipe. Thank you for sharing!!
Priya says
Yes, you can serve it with some curry as well
Carrie Robinson says
I don't think I have ever had these before, but they sound delicious. 🙂
Priya says
Yes, do give it a try! 🙂
Beth says
These look so delicious and yummy! I can't wait to make this!
Priya says
Thank you
veenaazmanov says
Healthy and perfect Breakfast option. This is so easy and quick and perfect for any meal. Goes well with the special Chutney. Thanks for your detailing.
Priya says
Glad you liked it. Thanks Veena
rika says
I love Indian food and am so excited to try this! I think I have some of the ingredients at home.
Priya says
Yay! Thank you